Just in the last year, we’ve published over 400 helpful tips and tricks for both iOS and OS X. That’s a lot of learning, and a lot of information for you to go through. We though it might be nice to take a look back through them all and come up with our favorite tips, organized into topical sections for your browsing pleasure, below.
Use iOS 6 Mail for Your iPhone, iPad, and iPod touch The Right Way
True, email is boring. However, it’s something we all use everyday to communicate for work, home, and pleasure. In iOS 6, Apple made a few changes to the way the Mail app works, tossing in new ways to sort, sign, and attach things to emails. Using the iOS 6 Mail app effectively takes a little bit of practice, a few tweaks, and the following five tips for using iOS 6 Mail the right way.
Control That Flood Of Email With Mark And Flag
I use email for a ton of different reasons. I use it to communicate with family, friends, colleagues, and business partners. I use email to keep track of things I need to get done today, tomorrow, and far into the future. Chances are, you do, too.
One of the ways I use email to keep myself on track and informed is by flagging emails for later perusal. I also mark things as read and unread to signal that I am done with the email, or that I need to actually read it later.
Now you can do these things right in the iOS 6 Mail app. Here’s how.
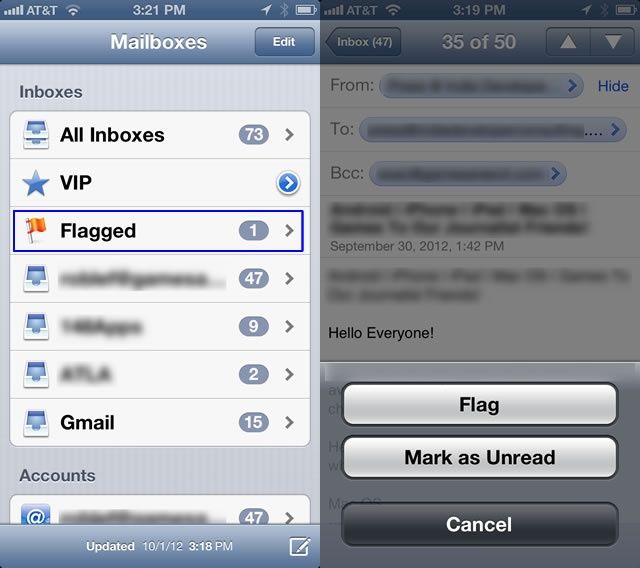
The simple way to do this is to open up Mail on your iPhone, iPad, or iPod touch, and find an email you’d like to flag. Tap the email itself and open it, just like you would if you were going to read it. Then look in the lower left corner and find the flag icon. Tap it, then choose either Flag to send it to the Flagged items list or Mark as Unread to keep it fresh and unread.
You can also flag items in the list view as well. Simply open the Inbox you want to mark items in, then tap the Edit button in the upper right corner. Tap on the email or emails you want to flag. Tap on Mark in the lower right hand corner, then choose either Flag or Mark as Read/Unread, which will depend on the initial status of the email you tapped.
To access your Flagged emails, head into the Mail app and back out to the Mailboxes screen. Notice the orange Flag icon and the Flagged email folder there. Tap it and you’ll see a list of all the emails you’ve flagged, regardless of the email address you received them in.
This is a great way to keep track of those super important emails that you Must. Never. Lose. so that you can be sure not to forget stuff. It’s a third place to keep email, too, making this the most flexible sorting system yet for the iPhone, iPad, or iPod touch.
Read The Full iOS 6 Mail Feature Here
Use Siri The Right Way On Your iPhone With iOS 6
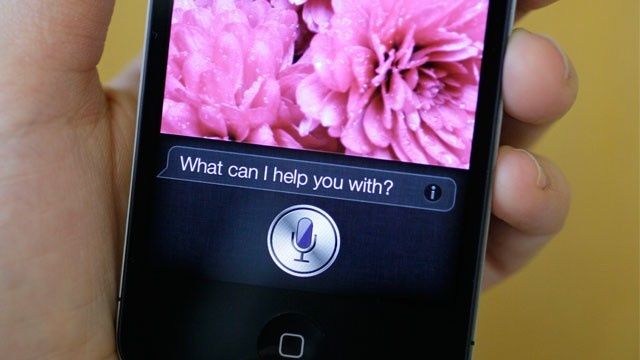
Photo: Cult of Mac
Siri has been updated along with the rest of the iOS in the new iteration from Apple. The personal voice assistant can take dictation, help you plan your wardrobe around the weather, keep track of your buddies, inform you on all sorts of sports information, and help you choose the best movie to go see, all using basic spoken English.
Of course, it helps to know what kinds of questions and commands you can actually say to produce the desired results. Here’s five things you can do with Siri the right way, so you can spend less time repeating yourself and more time going to those movies and meeting up with those friends.
Taking Dictation? Use Punctuation
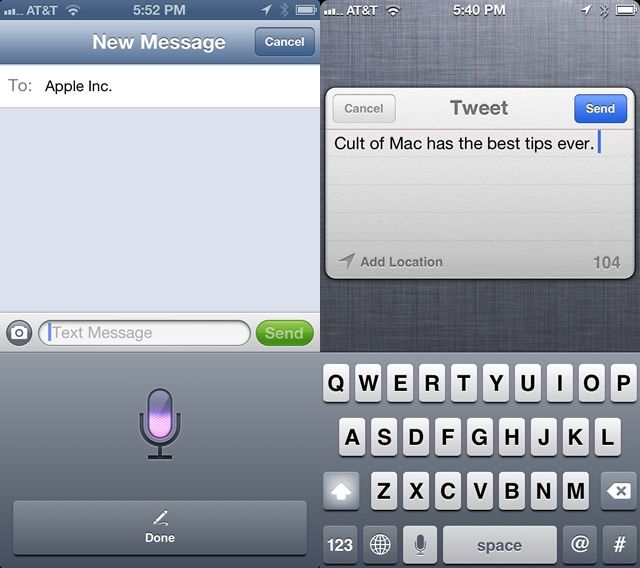
As a new owner of an iPhone 5 that can take dictation, I’m still playing around with Siri and the various places and times that it makes sense to use my voice instead of the keyboard. Obviously, a crowded, quiet room is not the best place to speak to my iPhone, but in the car certainly is. It’s even better that I’m not texting with my fingers in the car, either, since that’s just plain dangerous. For a quick message, now, I’m gonna use the iOS 6 dictation feature.
Apple’s got an entire Knowledge Base article on how to best use dictation on your iOS 6 iPhone 5 or iPhone 4S, and as I read through it, it struck me how much easier it will be to respond to text messages should they come in while I’m not in a place to easily type a reply. One thing that surprised me was the recommendation to speak punctuation aloud.
The obvious way to dictate in any app is to tap into a text field, like a text Message or Twitter field, which will bring up the keyboard. On an iPhone 5 or iPhone 4S, the little microphone icon will show up down in the left corner of the keyboard. Tap that and then begin to speak out loud, clearly and in a normal voice.
Apple recommends using punctuation, which makes a lot of sense — everyone’s intonation is different, and speech to text systems on the Mac OS take up a lot of processing power just to do that. Give Siri a break and just say the punctuation. Apple gives the following example (bold emphasis added by me):
Enter punctuation: Say the punctuation marks you wish to have inserted as they are needed. For example, to dictate “Pick up the new iPad and suddenly, it’s clear,” say “Pick up the new iPad and suddenly comma it’s clear period.”
Read the full Feature on Siri Tips here.
Learn The Best Ways To Use iPhoto For iPad

Summer time is vacation time, at least here in the U.S. With kids out of school for the warmest months of the year, families travel to amusement parks, historical sites, and even to other countries, making memories along the way.
What better way to store the photographic memories from this summer’s vacation than with high quality photos, edited, stored, and shared with just your iPad and iPhoto? Sound like a dream come true? Well, it’s not only possible, it’s fairly simple. Here are some of our favorite tips and tricks to use with iPhoto for iPad
Good Edits Make Better Photos
While the built in Photos app can do some basic things like rotating photos or sorting them into albums, chances are most of us have wished we could do a few more basic tweaks to our photos before we send them off to be printed or shared with friends and family. Now that it’s vacation time for a lot of families, we though it’d be great to run through some basic photo editing tips using Apple’s own iPhoto for the iPad, for easy yet powerful editing on the go.
First up, the iPhoto for iPad app is $4.99, which is surely not going to break the bank. Included with iPhoto are many of the pro-sumer level effects that should meet the needs of most, if not all, non-professional photographers. Download the app from the App Store right away to follow along step by step.
Cropping photos well is a basic yet underutilized editing technique that most photographers do first. In iPhoto, tap the photo you’d like to crop and tap, well, the Crop button in the lower left of the screen. Touch the image, then, to crop it. you can twist your fingers to rotate the photo, tap and drag the crop handle by its edges, or just pinch in or out to adjust the photo size relative to the frame around it. You can also tap the gear icon to choose a preset image ratio (like 4 X 3 or 5 X 7).
 Color correction is another quick way to make good images great. Select a photo, then tap the palette icon in the lower left of the screen. Touch the area in the image you want to adjust, and iPhoto will auto-magically know if you’re touching blue sky, skin tones, or green scenerey, and adjust accordingly. When the adjustment handles appear, you’ll be able to drag your finger left or right to adjust that specific color in the image. Touch anywhere else in the image and you’ll be able to drag your finger up or down to saturate or desaturate the color in the whole photo. Look below the photo to adjust colors with the four sliders along the bottom of the screen to adjust the saturation, blue skies, greenery, or skin tones for the whole photo.
There are even some preset color adjustments you can do by tapping the White Balance (WB) icon in the lower right. Just choose a preset, like Cloudy, Incandescent, or Sun, to adjust the image accordingly.
Read the full Feature on iPhoto for iPad here
The Best Ways To Use Reminders On Your iPhone
Apple introduced Reminders alongside iOS 5 and Siri (for the iPhone 4S) last October, and while the world wasn’t exactly stunned, the app made an impression. The trick with any app, of course, is finding ways to use it efficiently.
Below are five of the best tips we’ve found to help you use this simple app more effectively, all in one place for your viewing pleasure. We tried to make sure that we focused on features that all iPhone owners could use, so as not to leave out those who haven’t upgraded to a newer iPhone just yet.
Using Reminders On Your iPhone More Efficiently
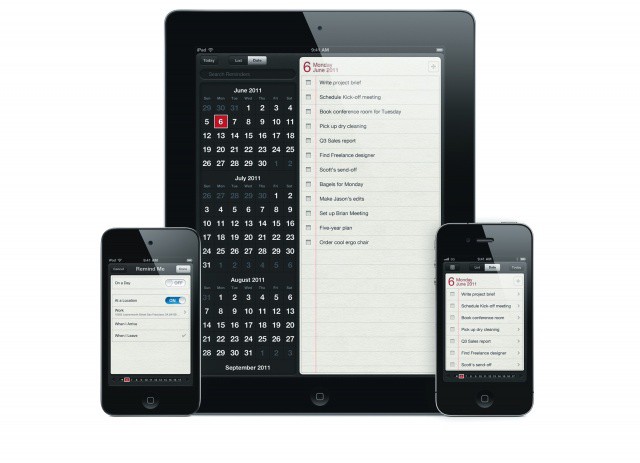
Reminders is a pretty powerful task list app. While it’s not a full project management suite, it does its job nicely with an easy to use user interface, location-based notification triggers, and iCloud syncing. Let’s start by walking you through the basics of using the Reminders app in a more efficient manner than just tapping away and hoping it all works out.
First, we need to create a new reminder. Launch Reminders from your iPhone. Tap the plus button in the upper right corner of the white area. The app will drop to the bottom of your current list and bring up the iOS keyboard. Type in your reminder. You can also just tap into the blank line below the last entry in your list.
When it’s typed in, tap on the Reminder you just created, and the keyboard will slide away. The Details screen will also pop up, where you can set a Reminder date or location trigger by tapping on the Remind Me field. Unfortunately, iPad does not have location-based Reminders. You can also set a Priority and add notes to your reminder here as well. Once finished, tap Done.
Of course, a good task management system should have a way to categorize things. Reminders has Lists, which are groups of reminders put together into categories you define. For example, to create a list of reminders for work, tap the button with the three horizontal lines on it, and then tap the Edit button in the top right corner. Tap on Create New List and type in “Work.” You’ve now created your own list. Tap Done to go back to the main Reminders screen.
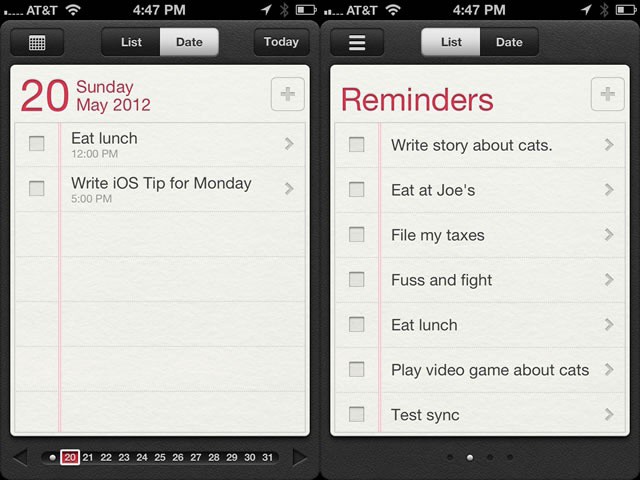
Notice the top of the Reminders screen? You can change the view by tapping on the List button to see all of your reminders sorted by list, or you can tap on Date to sort your reminders by date. To switch lists, simply swipe right or left in List view.
When in Date view, a swipe left or right will move one day in the calendar, while a tap and drag along the dates on the bottom will take you to the specific date you stop on. Just like in iCal, you can tap the Today button to take you back to the Reminders for the current date. A Tap on the calendar icon (it replaces the three lines List button in the upper left corner in Date view) will take you to an actual calendar, which can be swiped through as well, though up and down is the way it works in this view.
That should have you up to speed with manually creating Reminders on your iPhone. If you have an iPhone 4S or 5, of course, you can just tell Siri to remind you of what, where, and when you need to do something. The rest of the steps above still apply, though, for editing and scheduling of that Reminder.
![Our Editor’s Picks For 2012’s Best iOS and OS X Tips [Best Of 2012] mail](https://www.cultofmac.com/wp-content/uploads/2012/10/mail.jpg)
