With Apple’s recent ridiculous app store refusals, now is the perfect time to free your phone. Jailbreaking your device might seem too difficult to take on, but by following the steps below you can easily add a video camera to your 3G, or tether your Macbook to your 3GS. This How-To will guide you through jailbreaking your specific device using either Pwnage Tool or Redsn0w. Also included are simple instructions to unlock your device, letting you use it with different carriers.
Note: 3GS, 2nd gen and 3rd-gen iPod Touch owners who have recently updated to firmware 3.1 cannot jailbreak their phones unless they revert back to 3.0.1.
Why Should I Jailbreak?
Most iPhone owners know about jailbreaking, but they don’t know why it’s awesome. I mean, they gave Buzz Aldrin a rocket and told him he could take it for a spin around the earth a couple times and he took it to the effing moon. You have a tri-corder in your pocket, and you’re going to play Cro Mag Rally?
Tweaks like app switching, downloading videos from YouTube.app, sharing photos straight from you photo album, and customizing the look and sounds of your iPhone make jailbreaking seem like a no brainer. The initial hassle of spending some time following the steps below will be more than worth it when your JesusPhone realizes its true potential.
More Notes: If you jailbreak, don’t ever update your device firmware through the Apple software update ever again. Always use the updated Pwnage Tool to create a custom firmware bundle — then use iTunes to update your phone with the custom bundle. Your model of iPhone or iPod Touch doesn’t change the steps to jailbreaking but it does change which version of firmware and jailbreak software you should download. The links listed are for the latest jailbreak version at the time of posting. For updates refer to the Dev-Team Blog.
Ingredients
- USB Cable
- iTunes latest version
- Pwnage Tool
- The proper and current version of firmware for your device typically found here: ~/Library/iTunes/iPhone Software Updates/ or ~/Library/iTunes/iPod Software Updates/
You could Google this stuff for yourself, which is a great habit to get into, but I’m the one writing an exhaustive tutorial so here are the ingredients for each device:
iPhone
iPhone 3G
iPhone 3Gs- Caution: This is a 3.0 firmware jailbreak which is the only safe jailbreak for the 3GS. If you update to firmware version 3.1 you may never be able to use your phone on a carrier other than AT&T which is a fate worse than hell.
iPod Touch 1st Gen
- Pwnage Tool 3.1
- iPod Firmware
iPod Touch 2nd and 3rd generation jailbreak isn’t ready for version 3.1.
Preparation For iPhone and iPod Touch (Not iPhone 3GS)
Before you do anything, quit iTunes and iTunes helper. To quit iTunes helper, open up Activity Monitor (Applications>Utilities) and type iTunes helper in the search bar. Highlight the process and click “Quit Process.” If nothing shows up when you search, you don’t have the helper running. I’m not saying this is a necessary step, I just run into less bumps when I get iTunes out of the way.
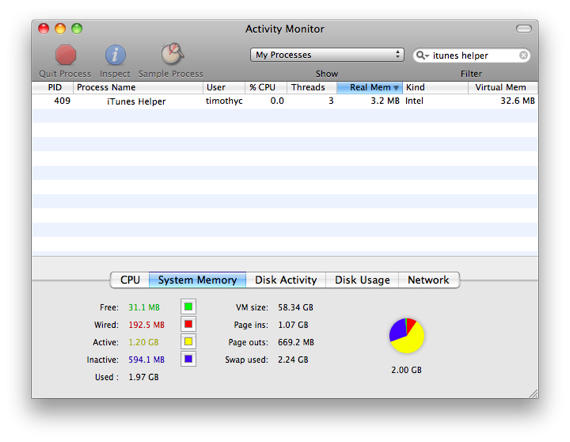
Make sure your device is not connected to your computer.
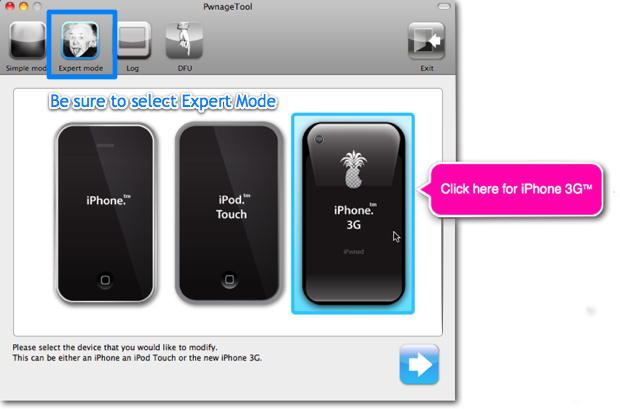
Open Pwnage Tool and make sure you’re in expert mode. Select your device and click the next button in the bottom right corner.
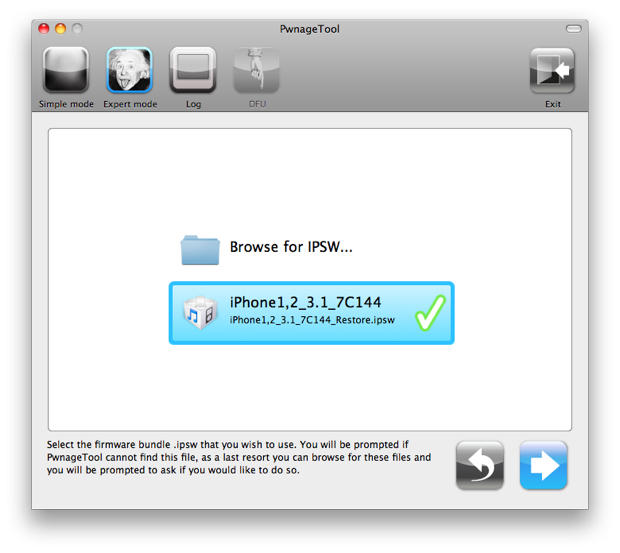
Pwnage Tool will now look for the official firmware bundle (ipsw). You should see the proper firmware pop up since you used the links above to download the correct version. Highlight your bundle and click the continue button.
Click on the general option in Pwnage Tool and then the continue button.
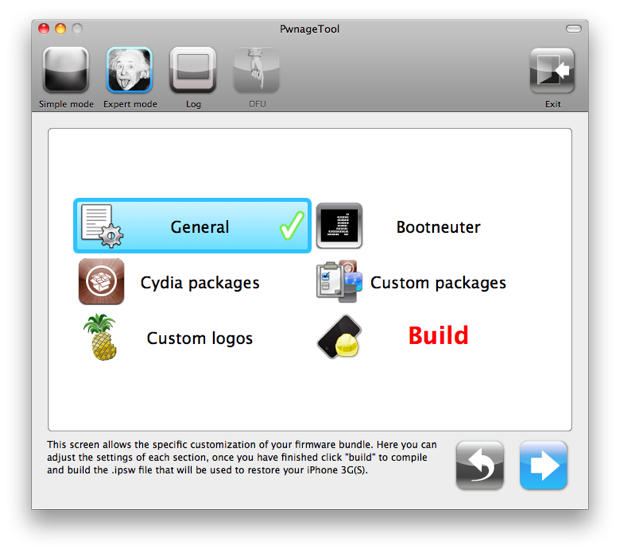
You don’t need to mess with most of these settings, but there are a few you should concern yourself with. On the first screen, you must uncheck the “Activate the phone” option.
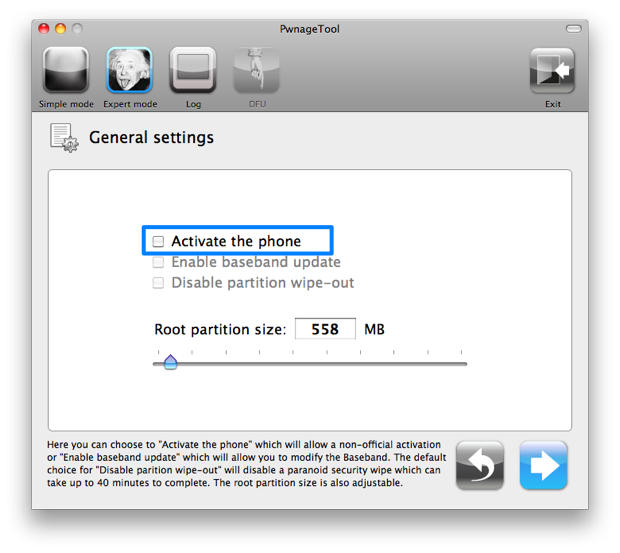
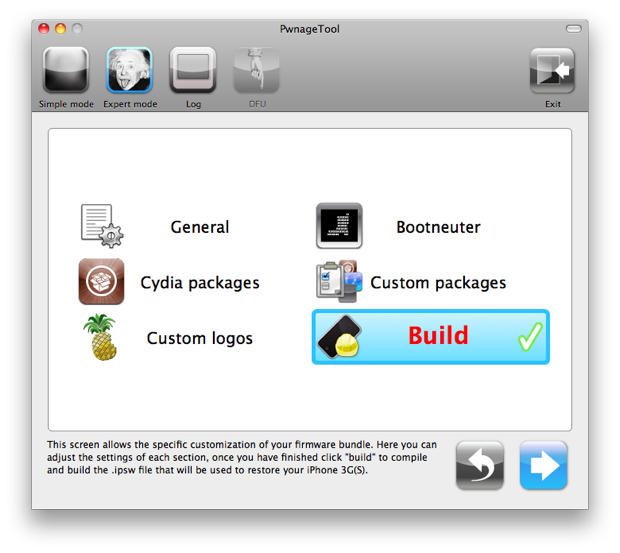
After you do this, continue through to the “Custom Logos” section. You can insert your own logos here, but I just use the default iPhone logos. Once you’re through the option screens, you’ll have to select the big bold red “Build” option and then continue to begin creating your custom bundle.
 Pwnage Tool will ask you if this if the phone has ever been jailbroken. Say no and it will assist you in putting the phone into DFU mode. You’ll need to put your phone into DFU mode to make your device open to the custom firmware bundle that Pwnage Tool created.
If you don’t want Pwnage Tool to guide you through the DFU mode process, you can follow these steps:
- Turn off your device
- Connect your device to your computer via USB
- Open iTunes
- Press and hold the Power and Home together buttons for ten seconds.
- While still holding the Home button let go of the Power button until iTunes recognizes a device that is connected in recovery mode.
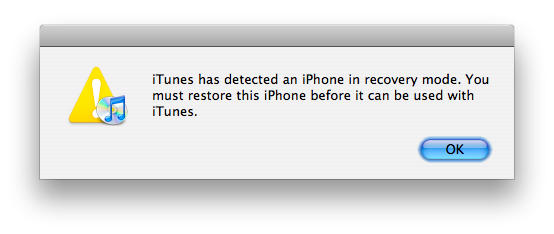
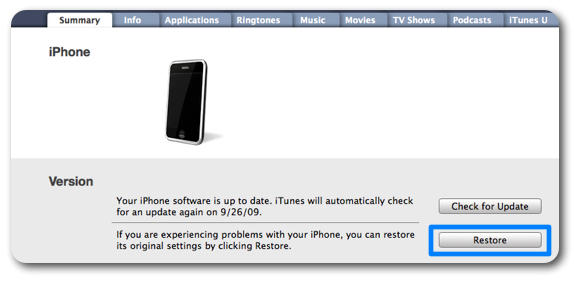
Navigate to your device’s summary window in iTunes and press option while clicking on the “Restore” button. Direct iTunes to your custom firmware bundle and open the file. Your device will then be updated with the new firmware. If you want to restore your device from a previous back up, you can certainly do so and you’ll still retain your jailbreak status.
If you’re working with Redsn0w for the 3GS these steps are a little different and are listed for you on the next page.
![Complete Guide to Unlocking and Jailbreaking the iPhone and iPod Touch [Jailbreak Superguide] pwnage](https://www.cultofmac.com/wp-content/uploads/2009/09/pwnage.jpg)

