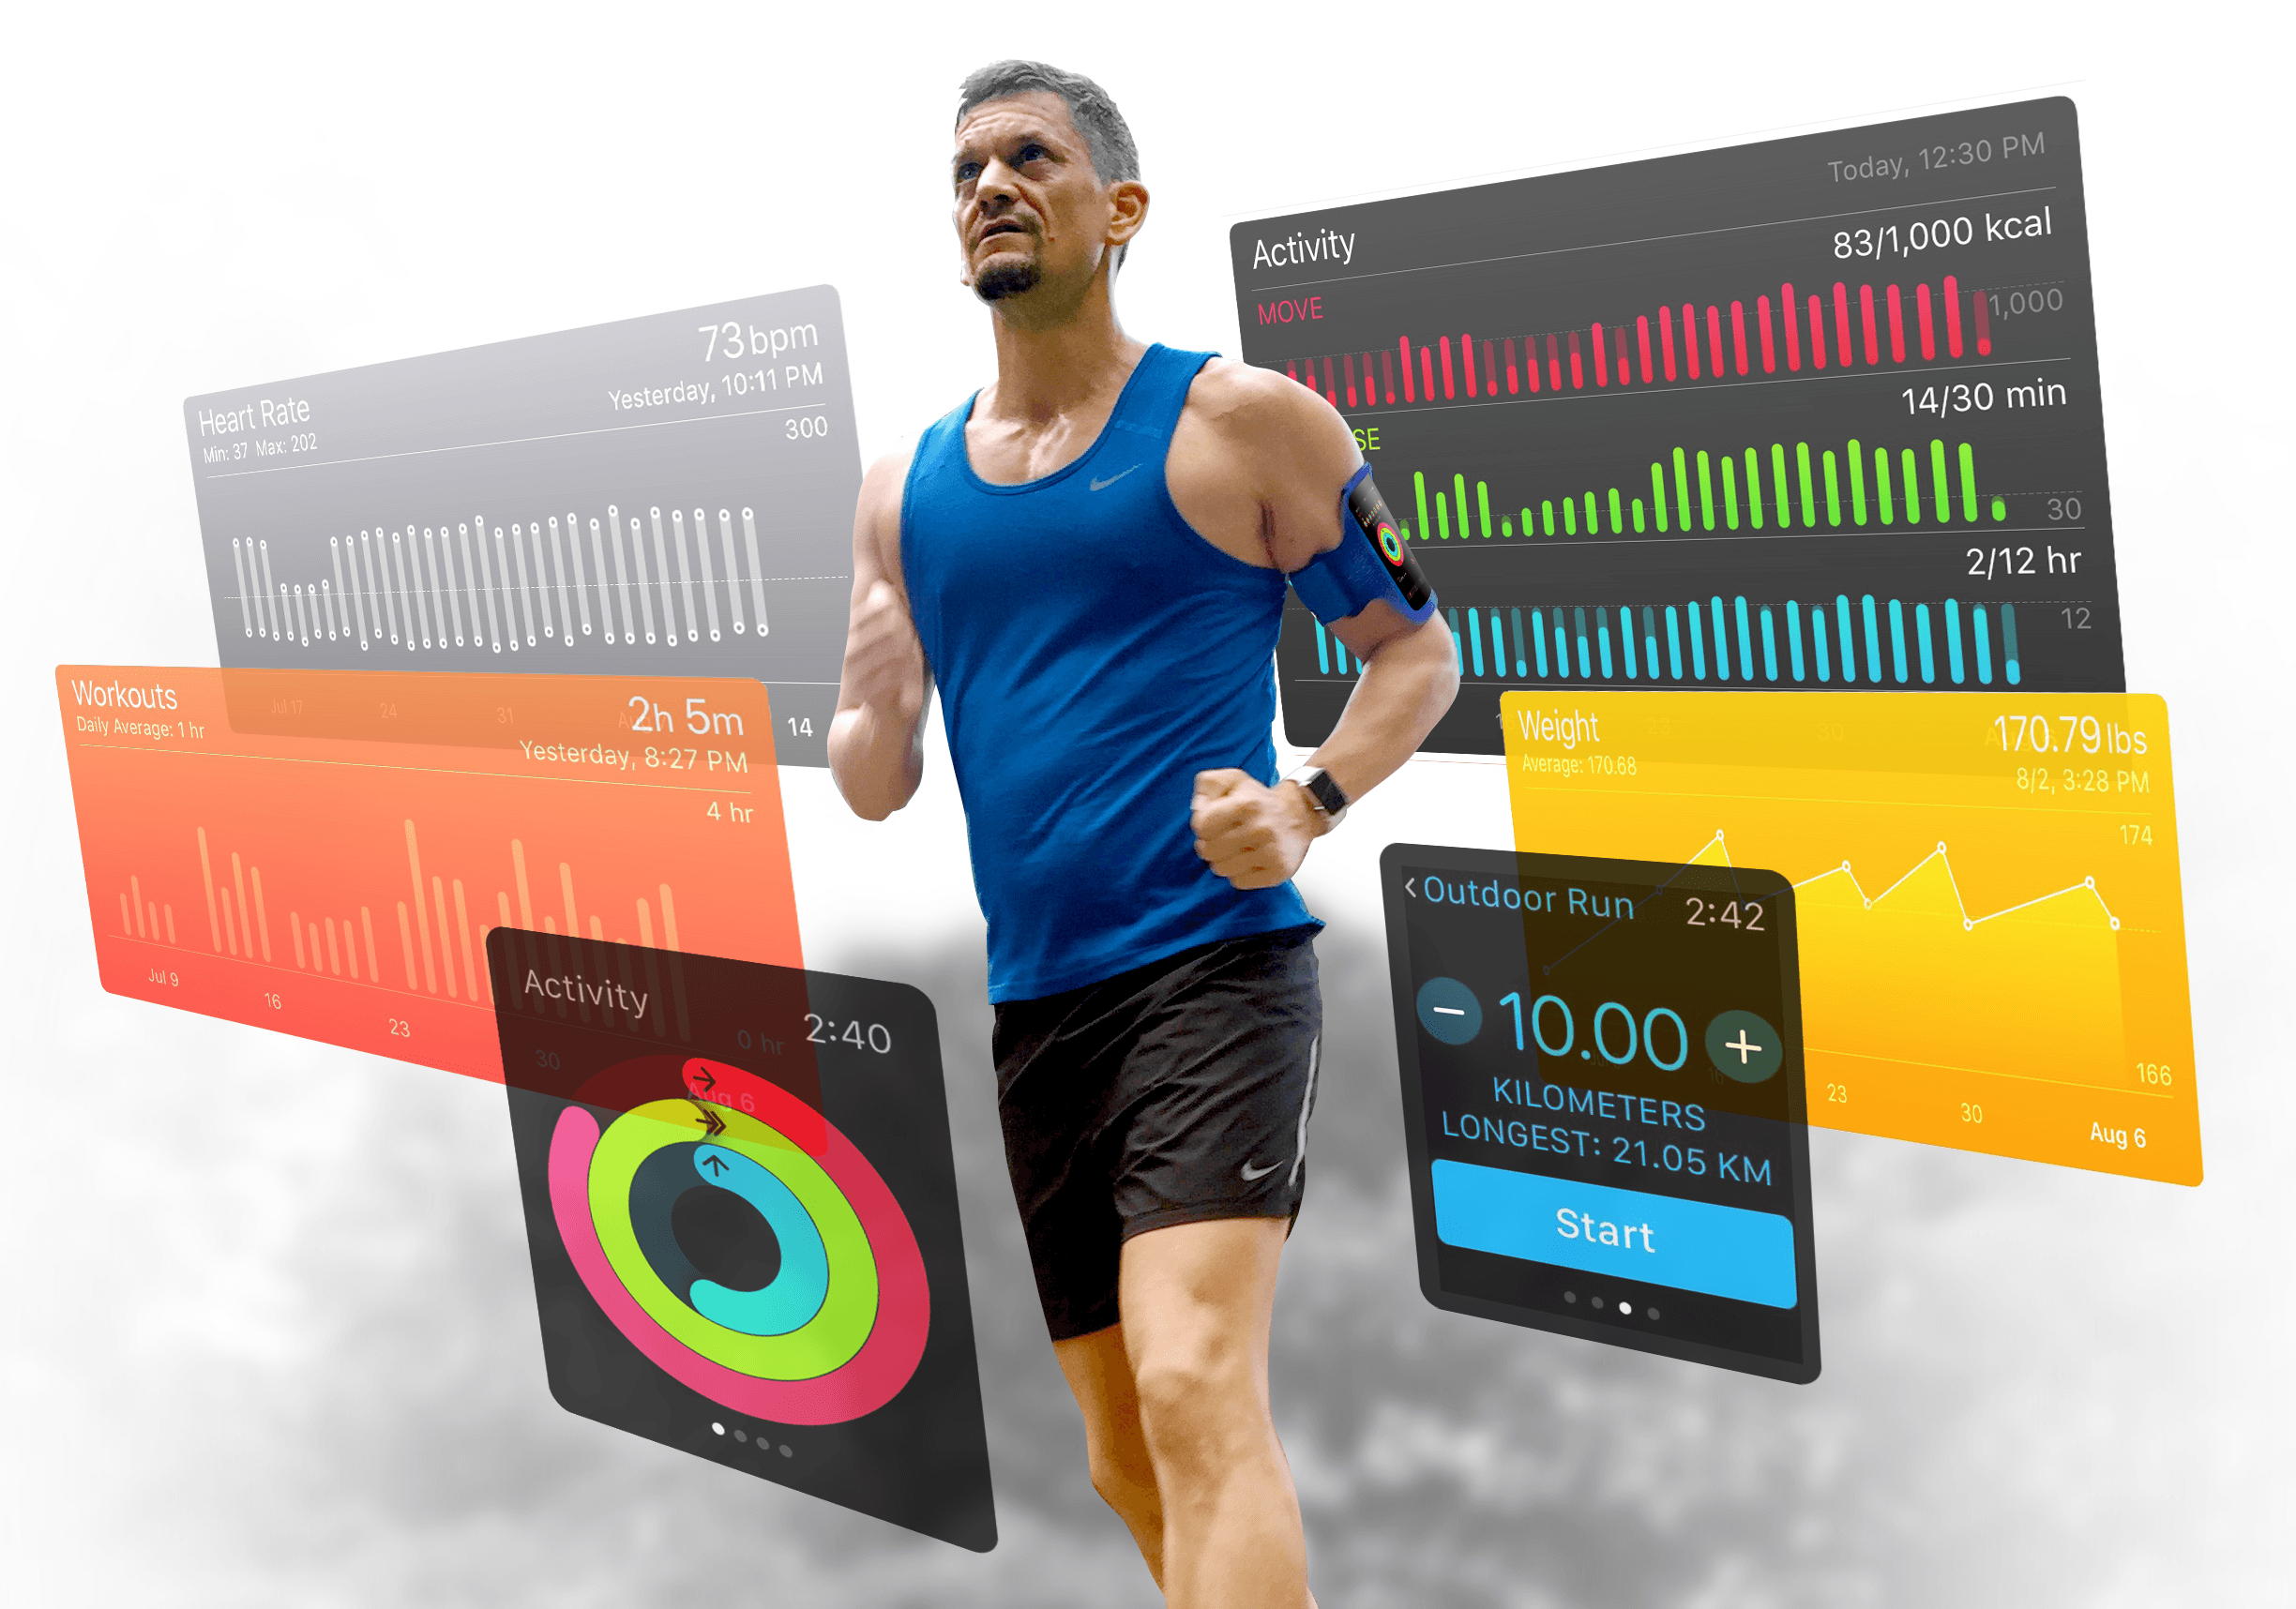
If you’ve just bought a shiny new Apple Watch Series 2, hoping it will help you get in shape, then here’s some advice: Invest a little time setting it up so your wearable is tailored to your personal fitness level and goals.
These quick and easy setup tips will help you get the most out of your Apple Watch fitness routine.
Editor’s note: This is an excerpt from the new Cult of Mac Fitness Handbook. It’s coming soon, loaded with iPhone and Apple Watch fitness tips — and it will be exclusively free for Cult of Mac readers.
![]() Setting up a new Apple Watch is a straightforward but time-consuming process. The first thing you will need to do is to pair your Watch with your iPhone. To do this, just open the Watch app on your iPhone and follow the onscreen instructions.
Setting up a new Apple Watch is a straightforward but time-consuming process. The first thing you will need to do is to pair your Watch with your iPhone. To do this, just open the Watch app on your iPhone and follow the onscreen instructions.
Which wrist should you wear it on?
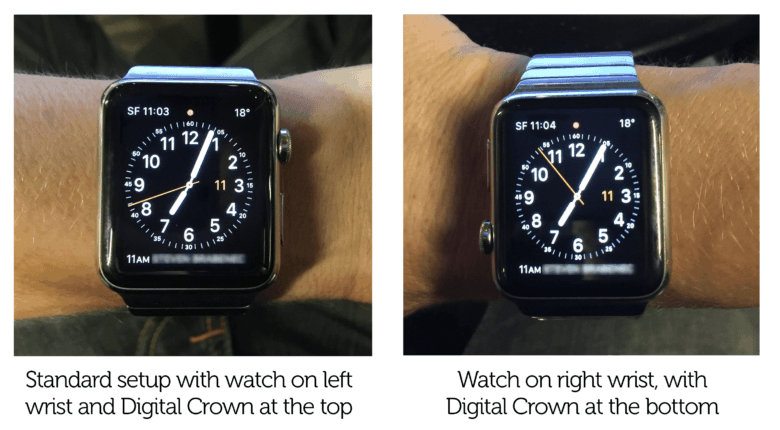
Photo: Graham Bower/Cult of Mac
During the initial syncing process, there are a couple of important choices you will need to make. The first is which wrist you want to wear it on. Apple Watch is designed primarily to be worn on your left wrist. This is because you will be operating the watch with your other hand, and more people are right-handed than left-handed.
If you are left-handed and choose to wear it on your right wrist, Apple effectively turns the display upside-down, meaning that the digital crown and side-button are on the left of the watch. While this is an adequate solution, it is far from perfect, since the digital crown is now underneath the side button, rather than above it.
Another consideration for fitness users is what you will be wearing during your workout. For example, weightlifters and runners often wear special gloves, and these can sometimes accidentally press against the digital crown and side button while you are working out. Wearing the watch on your other wrist, with the buttons pointing away from your hands, can solve this.

Photo: Petr Beneš
The good news is that it is easy to change the wrist orientation at any time. Just go into the Watch app on your iPhone, and you’ll find the option in General > Watch Orientation.
Which Apple Watch fitness apps do you need?
The next decision you will need to make is which apps to install. The setup process asks you if you would like to Install All apps. My advice would be: Don’t. Especially if you have a lot of apps installed on your iPhone. Apps that are useful on your iPhone often turn out to be pointless on your Watch, and will just fill it up with cruft. Instead, select the Later option, which allows you to personally curate which apps deserve to occupy precious space on your wrist.
Installing Apple Watch fitness apps
Once you have finished pairing your Watch, it’s time to personalize it.
Your new Watch comes with two fitness apps preinstalled: Workout and Activity. The workout app is pretty basic – it allows you to log workouts, but that’s about it. There is no option to sync your workout data with a website, or view charts of your progress, for example. So if you plan to do a lot of running or cycling, you might want to install a third-party alternative.
Watch apps are not stand-alone apps. They are extensions of iPhone apps. So if you want to install one on your Watch, you first need to install it on your iPhone, via the App Store.
Once you have installed an app on your iPhone, it doesn’t get automatically transferred to your Watch. To do that, you need to go back into the Watch app on your iPhone, scroll down until you find the App, tap on it, and then turn on the Show App on Apple Watch switch.
On your watch, all of the installed apps are displayed on the app launcher screen that you can access by pressing the Digital Crown once.
Setting up the Apple Watch Activity app

Your Apple Watch does not start tracking your activity automatically. You first need to activate the Activity app. To do this, tap once on the digital crown to access the app launcher, and then tap on the three-ringed icon of the Activity app.
In the Activity app, swipe right and tap Get Started. You’ll be asked to enter your age, height, weight and gender – all of which are used by Apple to estimate the calories you are burning as you move. You’ll also be asked how active you normally are, and based upon this, the Activity app will suggest a Move goal for you.
There are three goals in the Activity app, each represented by one of the three rings in the icon. When you complete a goal, the ring representing that activity will close. The Move goal is the outer red ring. It is the only goal that is tailored to you as an individual, based upon your current activity level, and it is measured in Calories. If in doubt, I recommend going for a low initial goal – you can always increase it later if it turns out to be too easy, and that is far more motivating than sheepishly having to reduce it because you couldn’t keep up.
The other two goals are Exercise (the green ring in the middle) and Stand (the blue ring at the center). The Exercise goal is 30 minutes per day. You don’t need to do this all at once. Apple defines exercise as anything at or above the level of effort of a brisk walk. So some daily activities like housework may also count.
The Stand goal is to stand for at least a few minutes each hour, for 12 hours. At 10 minutes to the hour, if you have not stood, the Activity app sends you a notification to suggest you stand up. If these get annoying, you can turn them off altogether in the Watch app on your iPhone.
Once the Activity app is activated, it will send you daily progress updates, and a summary each week, which sometimes includes a suggestion for increasing your Move goal. You may even receive the occasional medal in recognition of all your hard work. You can view all the medals you have ever earned in a virtual trophy cabinet in the Activity companion app on your iPhone.
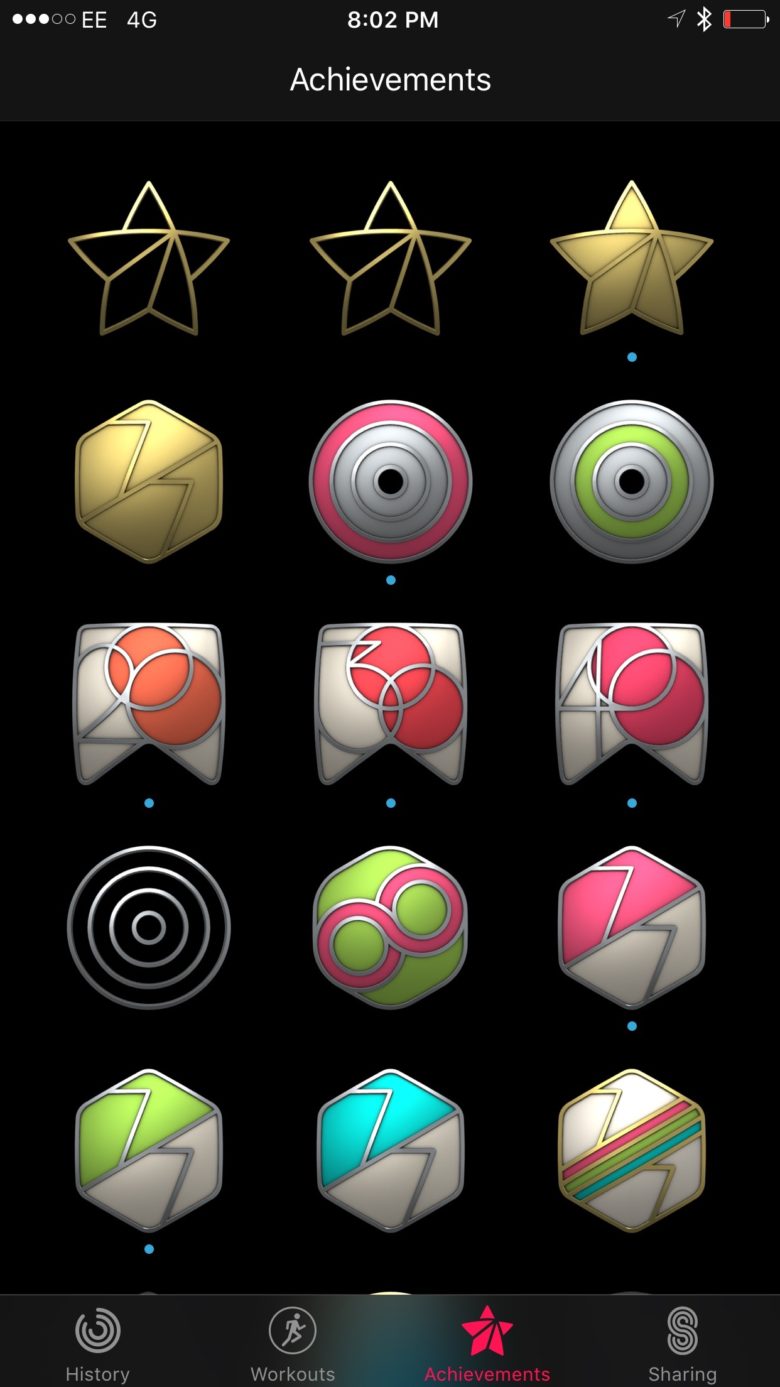
Photo: Graham Bower/Cult of Mac
Apple Watch Activity sharing
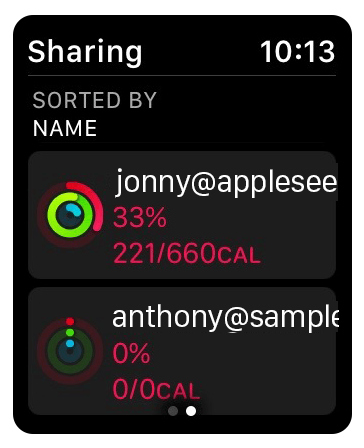
Photo: Graham Bower/Cult of Mac
In watchOS 3, Apple introduced Activity Sharing. This enables you to let your friends see your Activity rings, and lets you see theirs in return.
To add a friend, open the Activity app on your iPhone and tap the Sharing tab (bottom right). Then tap the plus icon (+) (top right) and enter your friend’s email address — they will need to own an Apple Watch with watchOS 3 installed for this to work.
Think carefully about who you want to share this with. It’s personal information, so you should only share it with people you trust. You should also consider what kind of feedback is motivating for you. If what you are really looking for is gentle encouragement, then don’t share it with competitive friends who are more likely to engage in banter or smack talk, for example.
Once you have set up Activity Sharing, you can see your friends rings at any time when you swipe to the right in the Activity app on your Watch.
Customize the Apple Watch Workout app

Once you’ve set up your Activity rings, you can turn your attention to the Workout app. This app is represented by a green icon with a runner on it, but it is not just for running – you can also use it to log cycling, swimming, walking, stair climbing, elliptical cross-trainer and wheel-chair workouts.
For each of these workout types, you can customize the display, to show the stats that you are most interested in while you are working out.
To do this, open the Watch app on your iPhone, scroll down to Workout and tap on Workout View. Here you’ll find two options: Multiple Metric and Single Metric. Multiple metric let’s you choose up to five different stats to feature on your Watch screen during your workout. For example, by default, Outdoor Run features Duration, Current Pace, Heart Rate and Distance. You can also add either Average Pace, Active Calories or Total Calories.
If all this sounds a bit too technical, you could chose the “Single Metric” option instead. This is actually the classic design of the Workout app from watchOS 1 and 2, with the minor modification that you now scroll vertically between metrics, rather than swiping horizontally. This enables you to operate it when the multi-touch display is disabled when it is wet (in the swimming pool, or from sweat), using the digital crown. Personally, I prefer the Single Metric view – it just looks nicer and less cluttered.
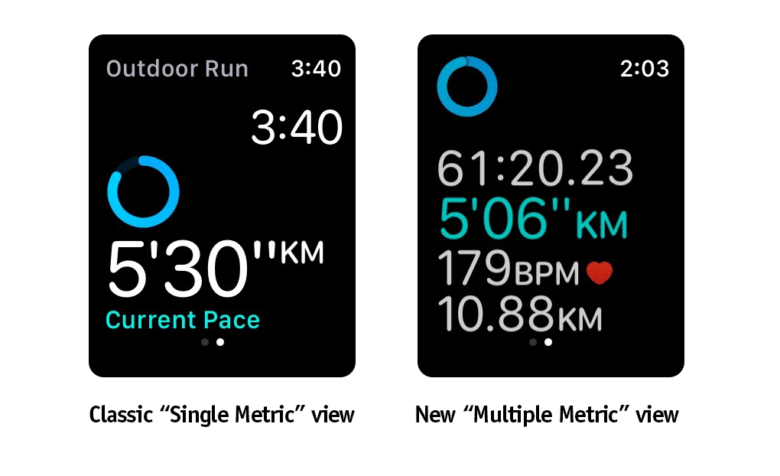
Photo: Graham Bower/Cult of Mac
More Apple Watch fitness tweaks
Add apps to Apple Watch Dock
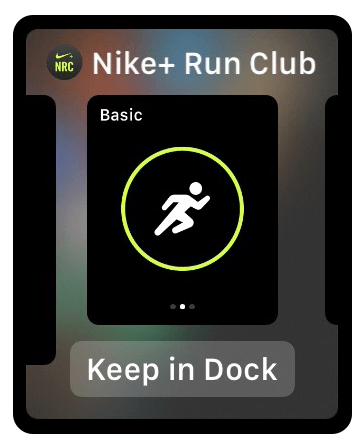
Photo: Graham Bower/Cult of Mac
In watchOS 3, Apple gives priority to the apps that you add to your Dock. This means that they launch more quickly and can update in the background more often. So it is a good idea to tidy up your dock and make sure all your essential Apple Watch fitness apps are in it.
The Dock is a new feature in watchOS 3. You access it by pressing the side button. Like the Dock on a Mac, it provides quick links to the apps you use all the time. It also gives you a snapshot of what these apps are currently doing. So for example, if you keep the Activity app in the Dock, you can see the status of your rings in the Dock snapshot without even needing to go into the Activity app itself.
On a new Watch, your Dock comes preloaded with a selection of apps. You can swipe up on any of those that you are unlikely to use to remove them. If you want to add an app to the dock, like the Nike+ Run Club, for example, press the digital crown to access the launch screen. Tap on the app you want to add, and once it is open, tap the side button to view the Dock. You will see Nike+ Run Club has appeared in the Dock, with a Keep in Dock button beneath it. Tap that button and you’re done.
The fitness apps you will probably want to keep in the Dock are: Activity, Workout, diet apps, and third-party running and strength-training apps.
Create an Apple Watch face for fitness
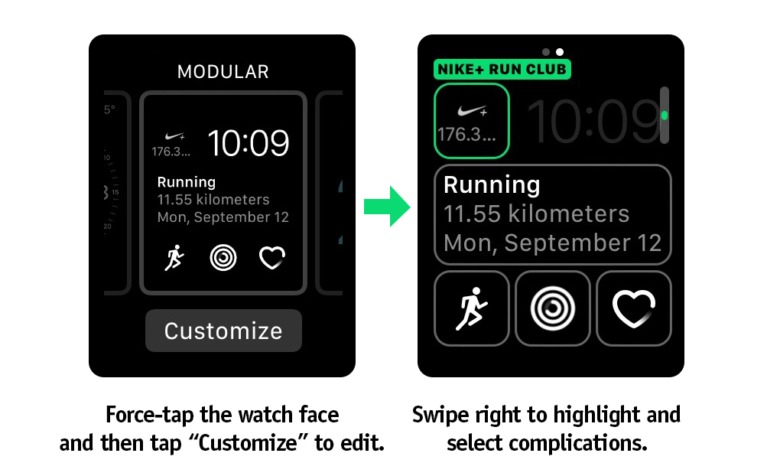
Photo: Graham Bower/Cult of Mac
In watchOS 3, you can swipe from left to right between multiple watch faces, each configured for a different occasion or activity. So it is a good idea to set up a special watch face for when you are working out with quick links to all your favorite health and fitness apps.
You can do this using “Complications” – which is watchmaker’s jargon for anything on a watch face that does not tell the time. Complications come in many shapes and sizes. Some small square-shaped ones appear in the corner of the screen. Others are larger, like the big one in the middle of the Modular watch face, or the full-screen complication on the X-Large watch face.
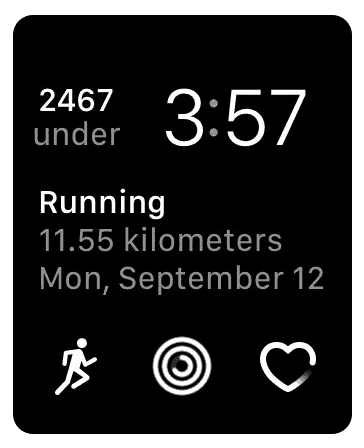
Photo: Graham Bower/Cult of Mac
One thing they all have in common is that they provide quick links for launching apps. Some also display information from the app they are associated with, (when there is sufficient space).
For example, the Workout complication can show details of your last workout, while the Activity complication can display your rings, or even how many calories, standing hours and exercise minutes you have logged today.
Another advantage of setting up complications is that, like apps in your Dock, apps that feature as complications on your watch face are prioritized by the system – so they launch more quickly and update in the background.
Any Watch app can offer complications, but not all of them do. The best way to find out what complications are available is to force-tap on the watch face you want to edit. Then tap Customize and swipe to the right to see the complication areas highlighted. You can then tap on a complication area and scroll using the Digital Crown to reveal what apps provide complications for that particular space.
Since this is a bit fiddly, Apple has introduced a Face Gallery tab in the Watch app in iOS 10. This shows all the different watch faces available, and featured complications that you can add to them. Currently, not all third-party app’s complications appear here, so you are better off checking on the Watch itself to see all the complications that are available.
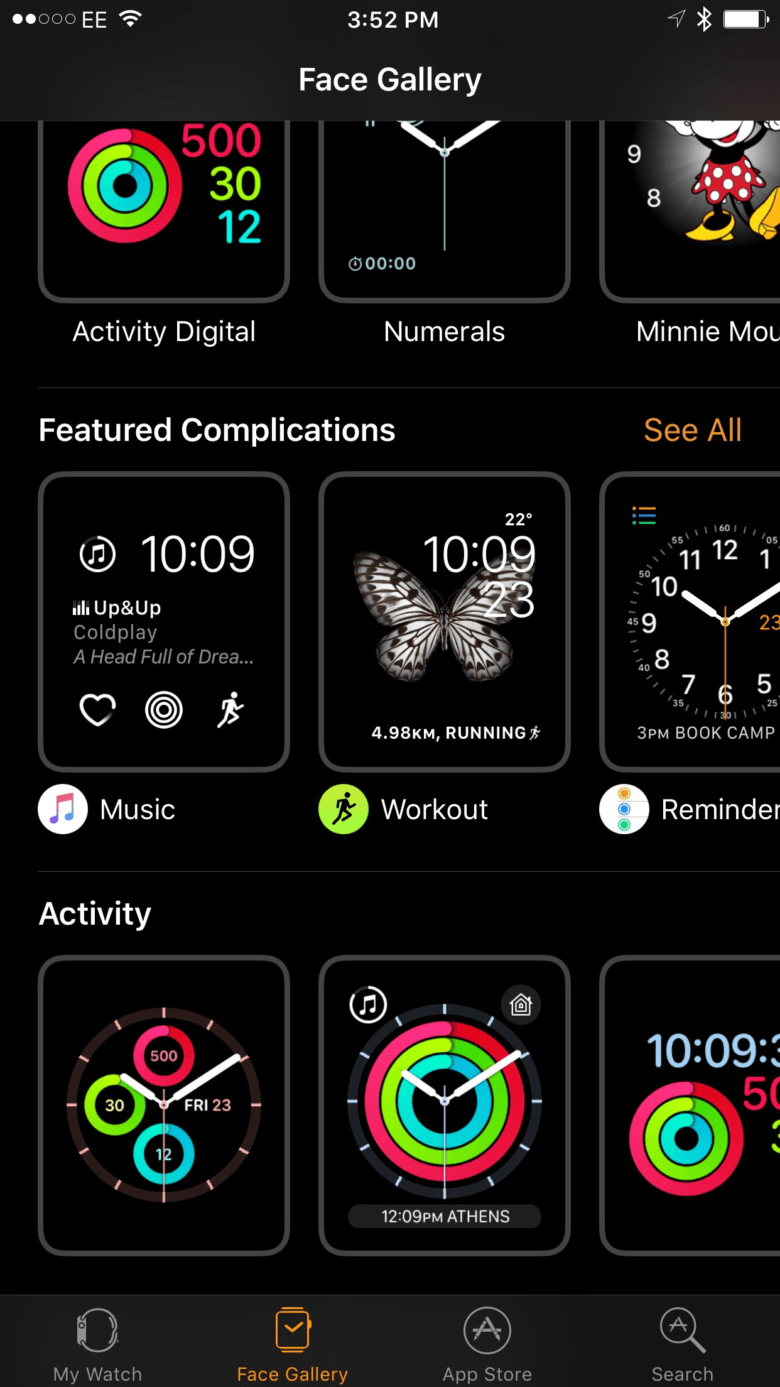
Photo: Graham Bower/Cult of Mac
One limitation with complications is that Apple only allows them to update up to 50 times a day. Which means that the kind of information they can display is quite limited at present. Some complications are nothing more than a static icon for launching an app. Even Apple’s apps for the X-Large complication are just great big icons.
Nonetheless, with a little patience, you can create a handy fitness watch face like this one, which shows how many calories I have left to eat (thank you Lose It!), how far I just ran, how I’m doing on completing my Activity rings, and quick links to the Workout and Heart Rate apps.
Make Apple Watch your own
One of the biggest advantages of Apple Watch is that it is far more customizable than traditional fitness wearables, which tend to take a one-size-fits-all approach.
With so many options, like installing third-party apps, setting up multiple watch faces and curating your complications, it’s worth taking the time up front to set up your Watch the way you want it.
Investing a little time now will pay off big time down the line, because your Apple Watch will support you more effectively in achieving your fitness goals.
Read more about Apple Watch fitness
To find out more about how to get in shape with your Apple Watch and iPhone, check out our upcoming ebook: Get in Shape With iPhone & Apple Watch. Coming soon for Cult of Mac readers.
Photo: Graham Bower / Cult of Mac
