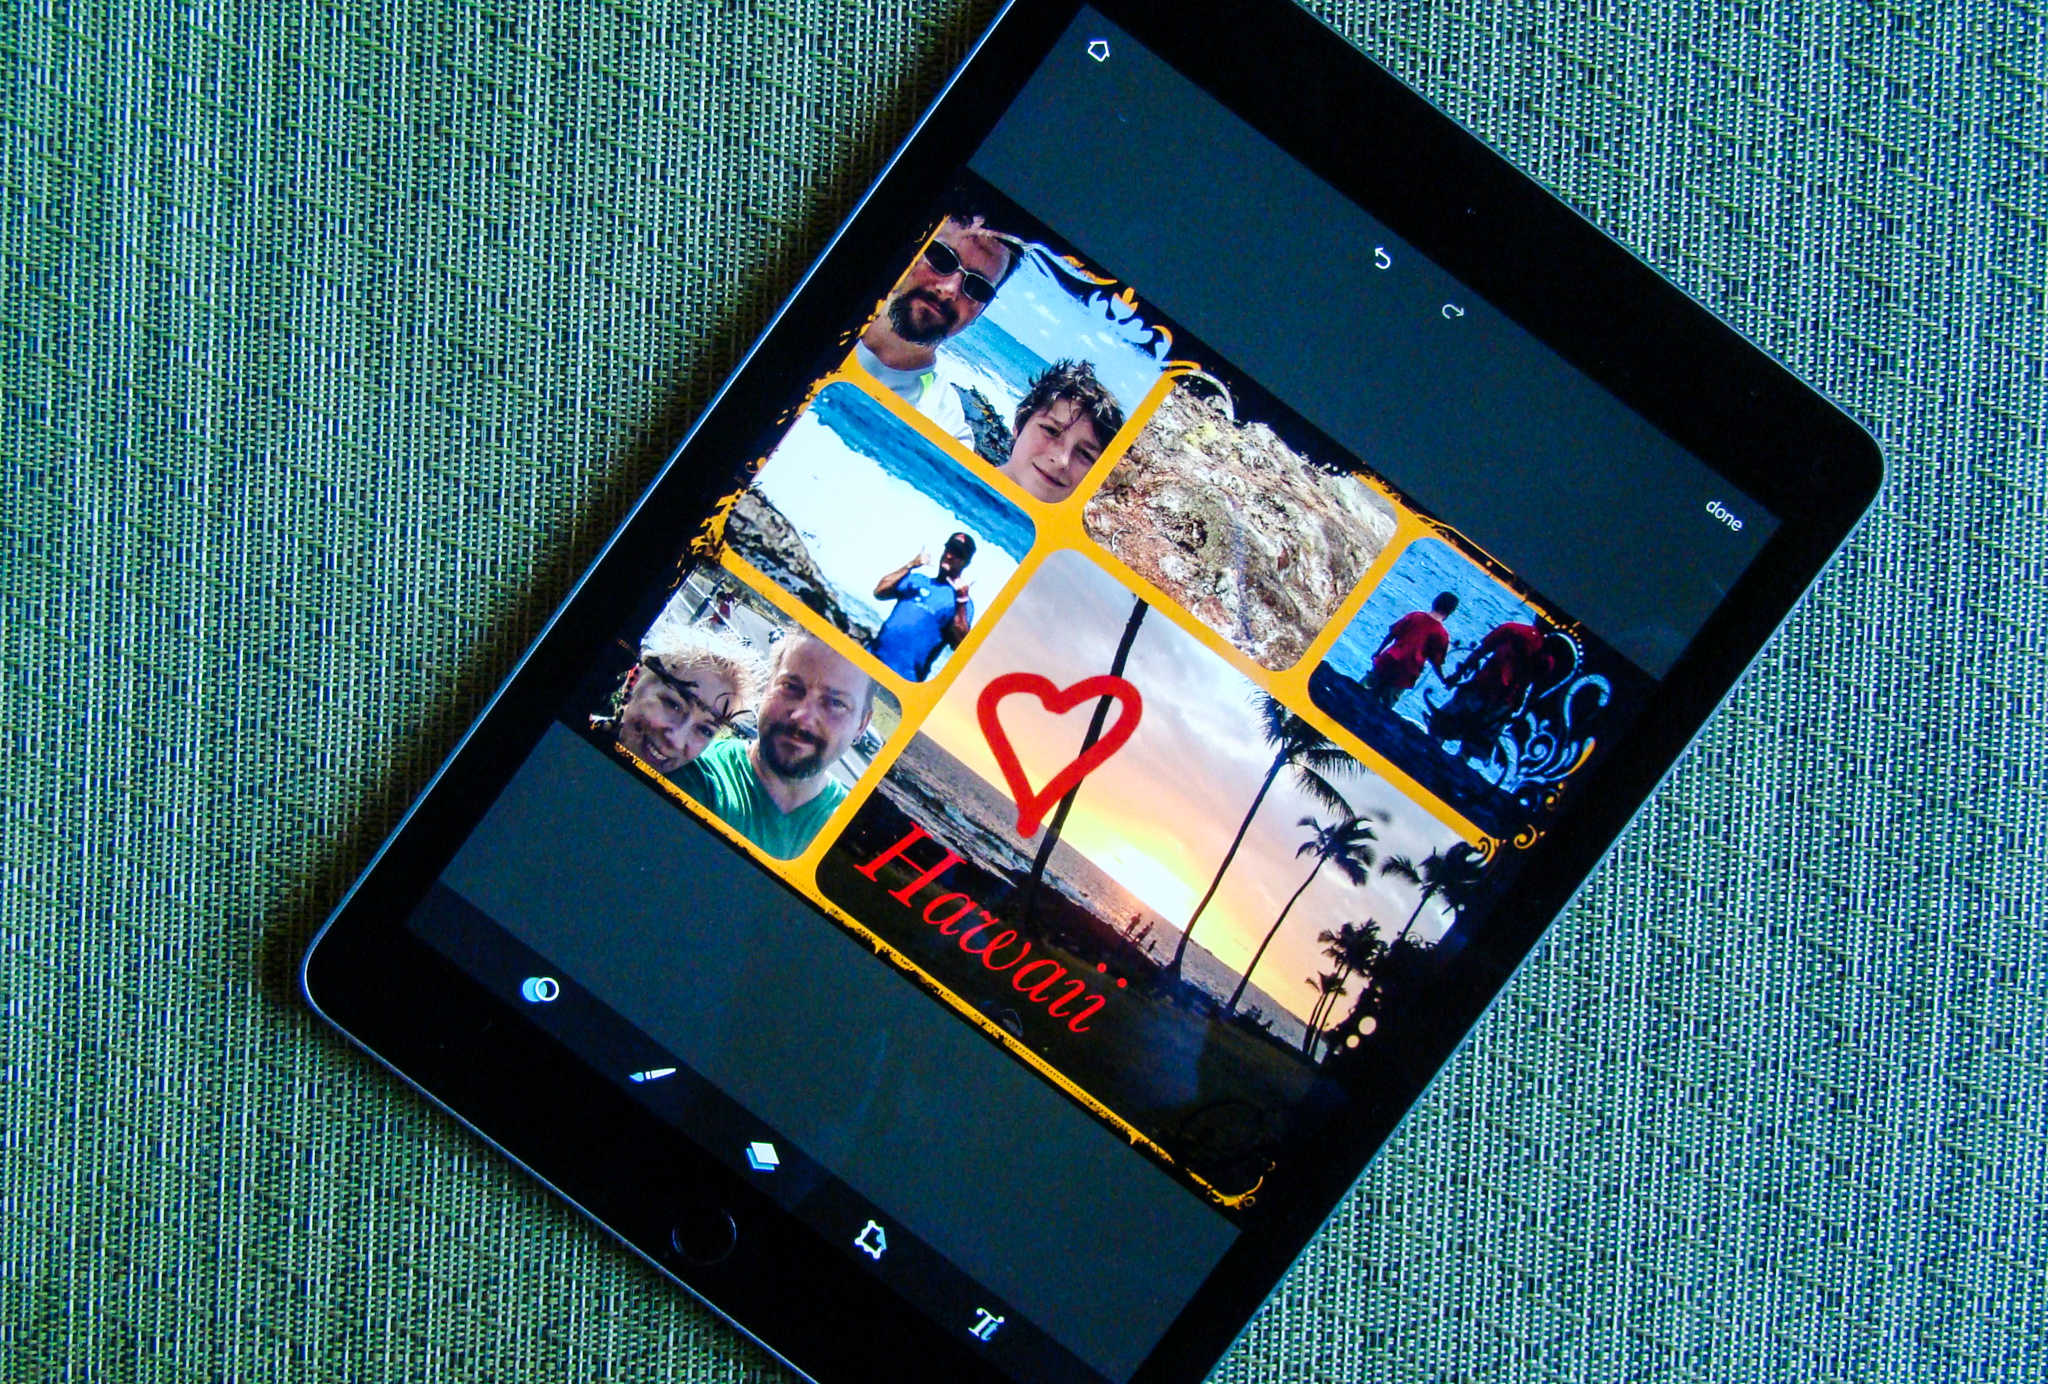
Don’t let the backlash against scrapbooking get you down — photo collages are fun. You can go to the store and buy a multi-framed monstrosity to put your hardcopy photos in and mount it on your wall, or you can use an app on your Mac or iPad to take some of the work out of it.
If you’re looking to make your own collage on your iPad, Pixlr is a fantastic choice, as it makes putting various photos together and adding fun effects incredibly simple and fun.
Here’s how.
Making a collage with Pixlr
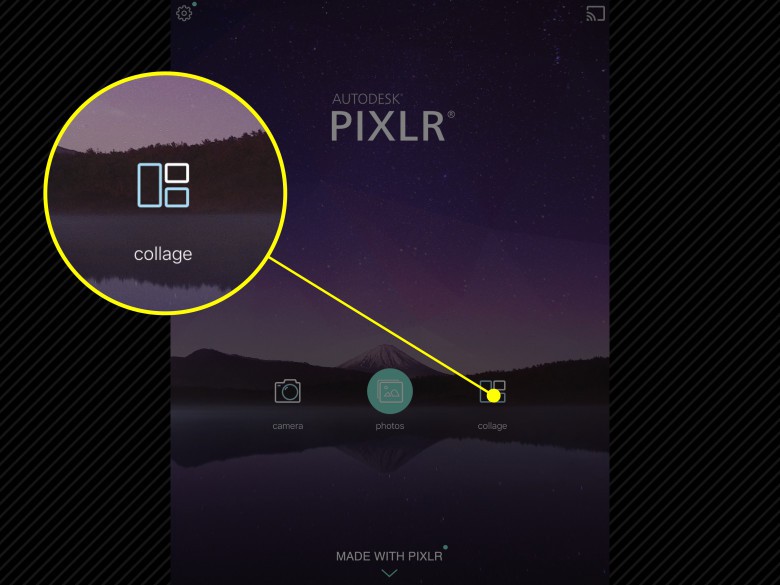
Photo: Rob LeFebvre/Cult of Mac
Launch Pixlr on your iPad and tap the collage button. You’ll get a screen with the default layout, but you can choose any of the ones in the row just below the main image area. Swipe to the left to see them all and pick the one that best fits your own photos and mood. I chose one with one big square area surrounded on two sides by three smaller squares.
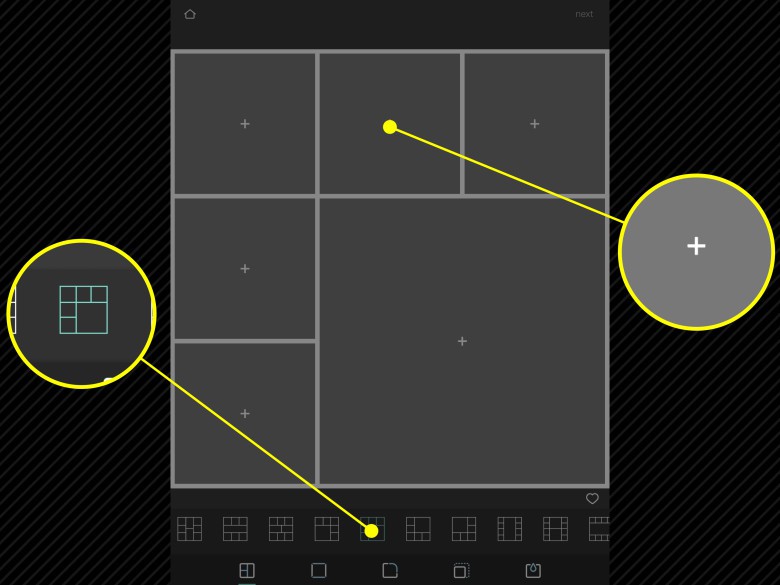
Photo: Rob LeFebvre/Cult of Mac
Tap on each of the gray squares with the plus symbol in them one at a time and choose a photo from your iPad’s Camera Roll. You can also look through your albums here as well to find the photos you want to add to the collage.
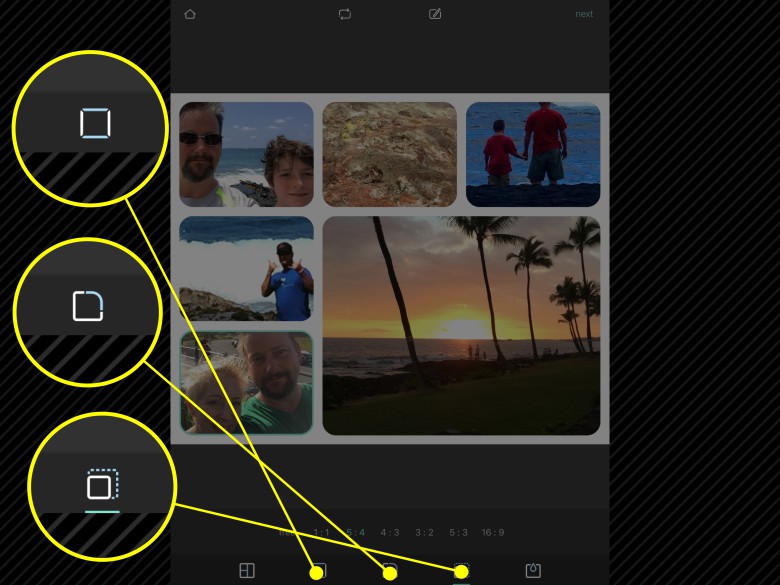
Photo: Rob LeFebvre/Cult of Mac
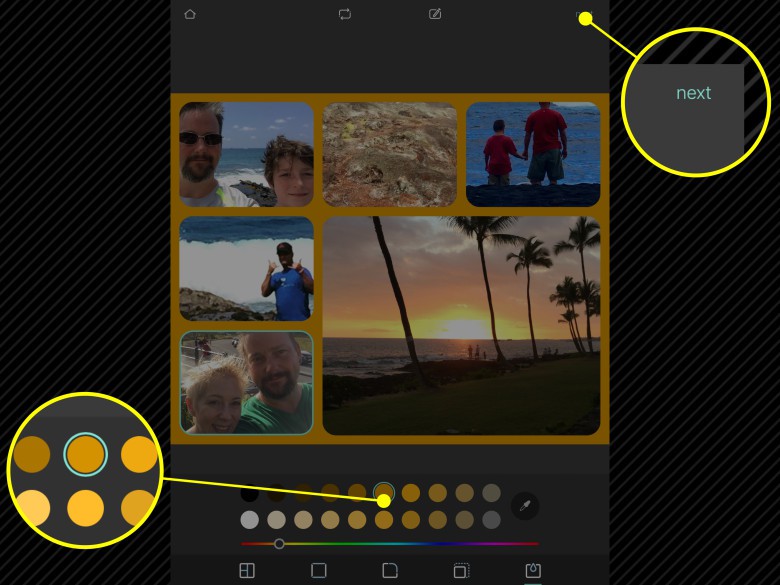
Once you’ve added a photo to each square in the collage, tap the next three buttons along the bottom row to choose the space between your collage photos, the roundness of the photo rectangles themselves, and the aspect ratio of the final product. Each of these options gives you a slider or a range of choices, simply slide or tap your way to the collage style you want to see in your finished product.
Finally, tap the color drop icon to the far right to choose the background color, then tap on the Next button in the upper right. Note that you’ll not be able to change anything you’ve just created past this step.
Finishing touches with Pixlr
Now that you’ve set your main collage, it’s time to have a little fun. Tap the dual circle icon in the lower left of your screen to get all the basic photo editing tools that you can use for collages as well as retouching photos.
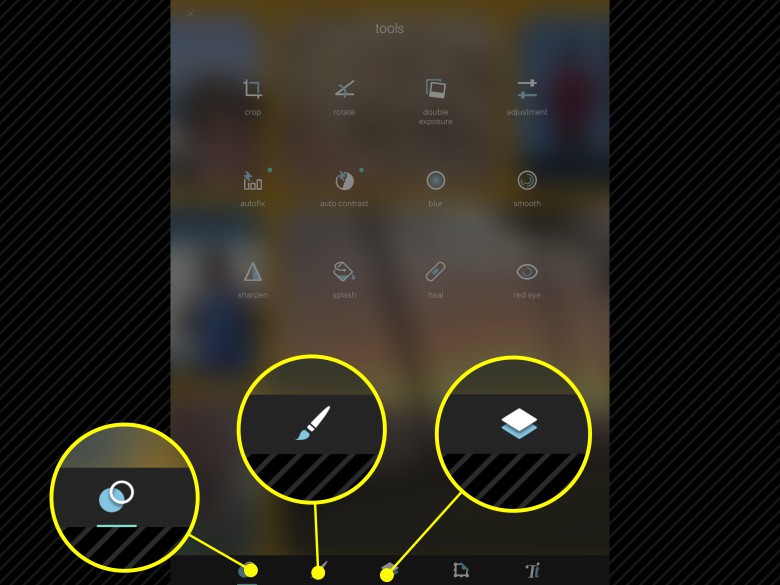
Photo: Rob LeFebvre/Cult of Mac
Tap the brush tool icon to brighten, darken, pixelate, or just doodle on your collage, like a scrapbooker might. Tapping the overlay icon (it looks like the layers icon in other photo editing apps) will get you preset effects, light leak overlays, and artistic stylization effects to take your collage to the next level.
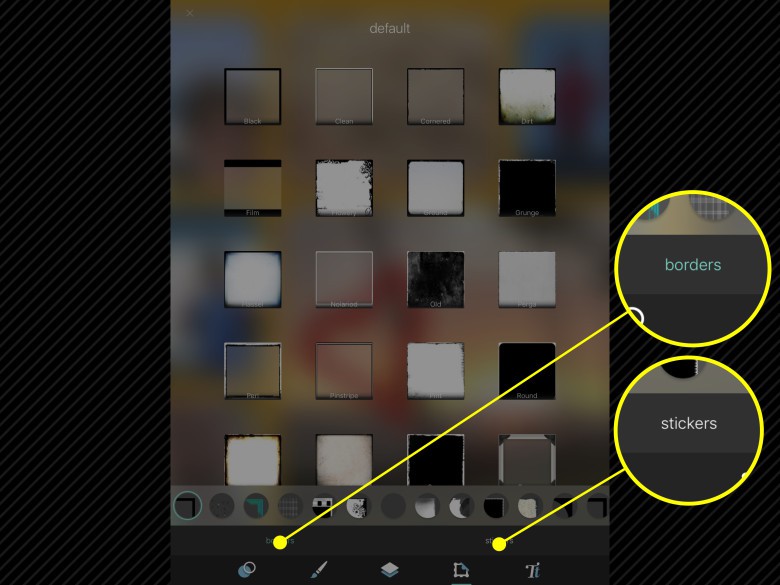
Photo: Rob LeFebvre/Cult of Mac
The frame icon looks like a folded-over stamp, but when you tap it, you’ll get a ton of cool borders to put around your collage, as well as a stickers button that will gift you hundreds of cool stamps to put on top of your collage, taking the scrapbooking metaphor to its extreme. Finally, the text tool can be accessed from the lower right icon. Simply tap it, type in your message, and then choose from various fonts, colors, and justifications to match your own artistic vision.
Now you’ll have a fantastic collage that you can share to Instagram, Facebook, Twitter, or just save to your own Camera roll. Making a gorgeous collage on your iPad is simple with Pixlr.
