Today’s how-to will show you how to install the command-line picture-manipulation tool ImageMagick, and how to build an Automator system service using shell scripting. The Service will take any number of pictures and make one long photo that contains them all. It’s as if you laid them out in a row on a table, only without a table, and with a computer.
Amazingly, it’s all pretty easy.
It might seem crazy to say it, but even in 2013, the command line is still the best place to do a bunch of tasks with your computer. Even crazier is that some of these tasks involve photos. Not convinced? Then let me tell you a story.
One of the most common things I do with pictures on my Mac is to take a few screenshots from an iPhone or iPad and combine them into one picture. We use landscape images in Cult of Mac posts, and iPhone screenshots are almost always portrait, so it makes sense to put three of them side by side.

The problem is that this is annoying busywork. I usually open one picture in Acorn, then drag the others in on top (Acorn adds them as layers). I then hit ⌥⌘-c to change the canvas size (tip: adding *3 after the existing pixel count in the dialog box will triple the width), hit ⌘-0 to right-size the view, and then manually drag the three screenshots to line them up. Then I save for web.
It’s a real pain in the ass.
So I finally decided to do something about it. I knew about ImageMagick, a command-line tool that can manipulate images in pretty much any way you can imagine. I also use Automator all the time to create System Services, which are essentially Finder (or other app) plugins that do things to files, folders and text.
I figured I should be able to combine these to make a workflow that would let me select some pictures in the Finder, right-click them and have them concatenated into a single picture. Bonus: Cult of Mac requires JPGs, so we’ll let the plugin output JPGs, whatever the input format (usually PNG for iOS screenshots).
Let’s go.

Installing ImageMagick
MacPorts And Homebrew
First up you need to install ImageMagick. There are many ways to do this: You can build and install it yourself or you can use something like Homebrew or MacPorts to do it for you. I used MacPorts, as there’s a dead-simple package installer for Mountain Lion, Lion and Snow Leopard. One caveat is that you’ll need Xcode and its command-line tools to be installed to use it, but Homebrew requires you paste one line of code into the Terminal to get it up and running.
The instructions for both are at the above links.
ImageMagick
Now you can install ImageMagick. Using MacPorts, type this:
sudo port install ImageMagickAnd to install ImageMagick using Homebrew type this:
brew install ImageMagickAutomator
Next up, we need to build our Automator workflow. Open up the app and choose “Service from this window (it should pop open on launch. If not, or if you’re already tinkering in Automator, just hit ⌘-N for a new file).

Now we’ll add some steps to our workflow. We want the “Run Shell Script” action. The quickest way is to search for it in the left column and drag it to the big canvas on the right:

Now we will add a command. Note: If Automator wants to add a “Get Selected Finder Items” to the beginning of this workflow, then let it. If you want to test the workflow inside Automator, you should add it yourself. Just make sure to remove it when you save the workflow, otherwise it’ll run twice and you’ll get some odd results.
 First, change the drop-down next to the “Pass input” option to “as arguments.” This will pass your files as files (I think, anyway — I’m no coder). Then we need to paste in the actual command.
The format for our ImageMagick command is this:
$> convert +append a.png b.png c.jpgThe “convert” part is the command we’re using. The “+append” forces ImageMagick to put the images side by side (remove it to stack them vertically), and the “a.png b.png c.jpg” are — somewhat confusingly — two source files and an output file.
You’ll see that Automator already added in a chunk of code to the edit box. You just need to paste this after the line that reads “do”:
/opt/local/bin/convert "$@" +append ~/Desktop/shot.jpgAlternatively you can just select-all in the edit box and paste in the whole thing:
for f in "$@"
do
 /opt/local/bin/convert "$@" +append ~/Desktop/shot.jpg
echo "$f"
done
It’s important to note that I have included the full path to the “convert” command here. Depending on your install (whether you used Homebrew or MacPorts), this might be in a different place. This version works with MacPorts installs. I have also hard-coded the path of the resulting file (the desktop) and the name of the file (shot.jpg). The only thing I want to change is the name of the file; I can’t figure out how to make the script grab the name of one of the input files and use that as the root of the resulting JPG. Any help is welcome (via email or Twitter is best).
Now you can test it by selecting some images in the Finder and running the workflow (use the big “run” button in the Automator toolbar). Note: You’ll need to have the “Get Selected Finder Items” step added at the beginning to make this work inside Automator itself.
If it works, go ahead and save it. Give it a suitable name (I called mine Two Up, although it’ll do any number of images, not just two). It should now appear as an option in the Finder when you right click on image files.
As soon as I pasted the results of my labors into the Cult of Mac chatroom, everyone started whining and asking for white space at the edges, and other prissy little demands. But you can do all of that with ImageMagick if you like.
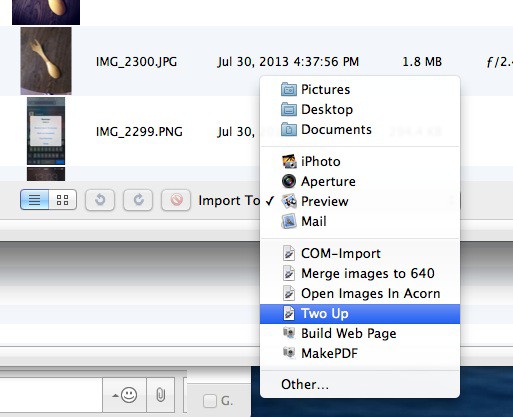
I didn’t like, but I did think it might be a cool idea to be able to automatically tile pictures together as I imported them from my iPhone. I made an Image Capture plugin to do it.
Image Capture is a great built-in Mac app that lets you copy and delete photos from your iDevices, as well as importing things from scanners. And you can tell it to apply certain rules and plugins on import.

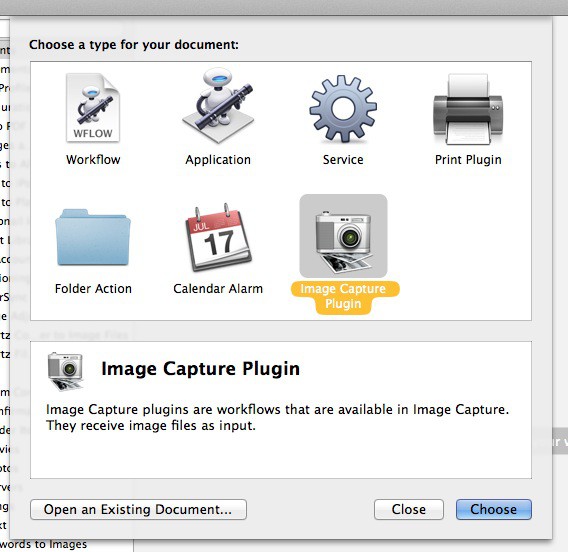
To make a plugin, you just create a new file in Automator, only this time you choose Image Capture Plugin as the document type. Then just copy/paste your workflow steps from your first project into this one. Save, name and you’re done.

Now, when you open up Image Capture with an iDevice plugged into your Mac, you can just select a few pictures right there on the device and send them into this workflow. The file will be saved on your desktop without importing the actual files or removing them from your iPhone.
Clearly the options are almost endless. Take a look at ImageMagick’s library of commands to see how powerful it is. And that’s before we get something like Hazel involved, which can run shell scripts automatically based on all kinds of triggers.
![Use Automator, ImageMagick And Shell Scripting To Easily Splice iPhone Screenshots And Other Pictures [How To] shot.jpg](https://www.cultofmac.com/wp-content/uploads/2013/07/shot1.jpg)

