Problem: You use Lightroom for your fancy photos from your fancy camera, and you want to put the best of those on your iPad.
But you also shoot a ton of pictures on your iPhone, and you want to back those up to iPhoto on your Mac, and send the best of those to your iPad too.
It sounds like a mess waiting to happen, right? Thanks to two little features, though, you can do all of this without breaking a sweat.
We’re going to split this task up. First, we’re going to use Lightroom’s Publishing Services to sync our fancy photos with our iPad’s photo library. And second, we’re going to use what I call Photo Stream publishing to send pictures from (Mac) iPhoto to our iPads. And magically, these will all exist in happy, hippie harmony.
Lightroom
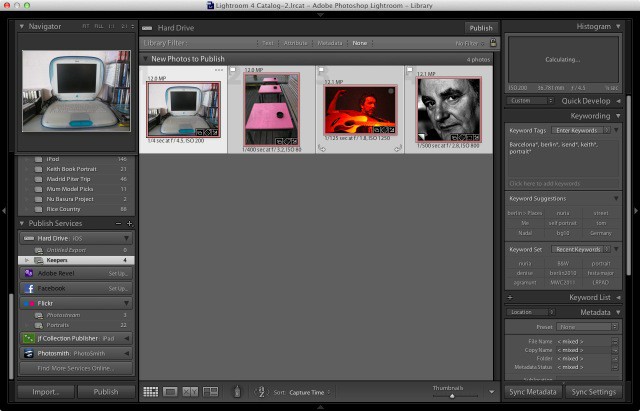
When you sync your photos to your iPad, you have two choices for their source. One is your Mac’s iPhoto library, which is tempting as you can select which albums you want to sync right there in iTunes.
The other option is to pick a folder. Every time you sync your iPad, iTunes will check this folder and make iPad-friendly versions of the pictures therein. You can even choose which subfolders you wish to sync.
For a kludgy workaround, folder syncing works surprisingly well.
But how to get the photos into that folder? That’s easy, thanks to something Lightroom calls Publishing Services. This is a way to sync your photos to various online services like Flickr and SmugMug, but it can also be used to “publish” to a local folder.
Once configured, you just have to hit the “Publish” button from time to time to send any new pictures off to that folder, form where they will be automatically picked up by iTunes and therefore sent to your iPad.
Configuring The Lightroom Publishing Service
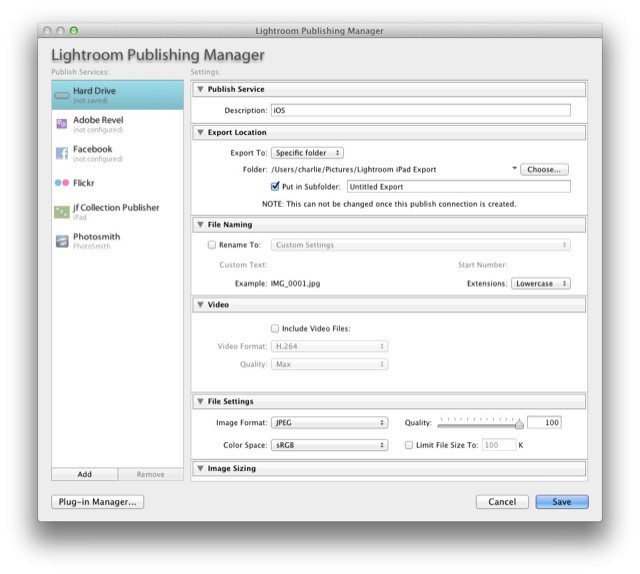
In the Library module, scroll the left-hand tool panel down to Publish Services, find the “Hard Drive” entry and click “Set Up…”
Then, give the collection a name (iPad is a good one), choose a folder somewhere on your Mac to publish to (pick well, as you can’t change this without deleting the Publish Service and starting over) and enter the settings. ITunes will automatically resize your images to fit the destination iPad, so I leave the images at full size, and opt to keep all metadata intact (if your photos contains geo-location data, they’ll also show up on the map in iOS’ Photos app).
Now, start adding photos. To do this, click again on the Service you just created and add a folder. Then drag photos into this folder. When you’re done, click the folder and you’ll see all the pictures you just added. Click publish and you’re done. If you add more pictures or modify the ones in the collection, you can re-publish at any time to update.
Bonus: Smart collections can also be added here, letting you automatically send all your five-star photos, say, or any other smart collection of images
iTunes
Next, head over to iTunes and plug in your iPad. In the sync settings, pick “Photos” and change the source from “iPhoto” to “Folder,” and navigate to the folder you just created in Lightroom. Now you can choose to sync either all the subfolders within that folder, or to select the ones you want to sync.
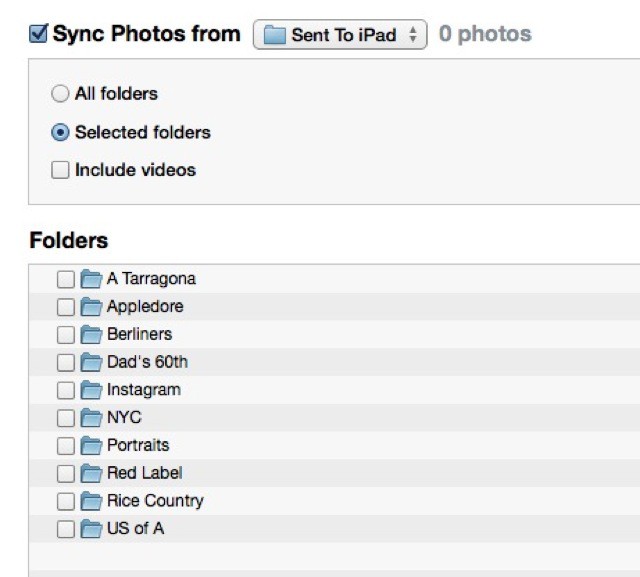
Whichever you choose, the subfolders will be sent to the iPad as albums, and those albums will inherit the names of the folders.
iPhoto
Next Up is the other part of the puzzle — syncing our iPhone pictures with iPhoto and also our iPads When we told iTunes to sync a folder of images with our iPads, we cut iPhoto out of the loop. It will still suck the photos from our iPhones when we plug them in, but it won’t share any of its albums.
Enter Photo Stream.
Photo Stream Publishing
You probably know photo stream as the service which syncs your photos between all your iDevices, letting you snap a picture on your iPhone and — seconds later — edit it on your iPad. Or you may use it to share pictures with iPhone-owning friends.
But did you know that you can create a shared photo stream and share it with yourself? Or — further — that you can create these personal shared streams from iPhoto on your Mac?
It’s easy. All you do is select the photos you want to share and then click the little sharing arrow down at the bottom right of the iPhoto window (or pick “Photo Stream” from the Sharing menu).
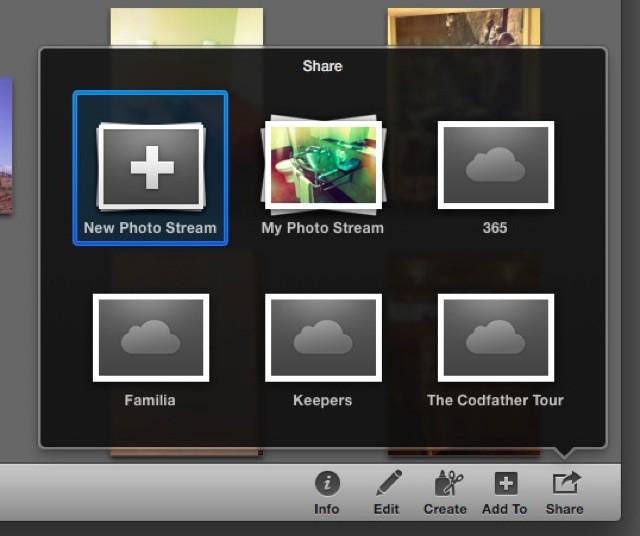
Then, pick “New Photo Stream” in the popover, tap in your e-mail address (use the one associated with your Apple ID), give it a name and hit “Share.” You’re done. Pick up your iPad and take a look at your Photo Stream tab. The new album is right there, and you can even add new photos to it from the iPad (or iPhone) itself.
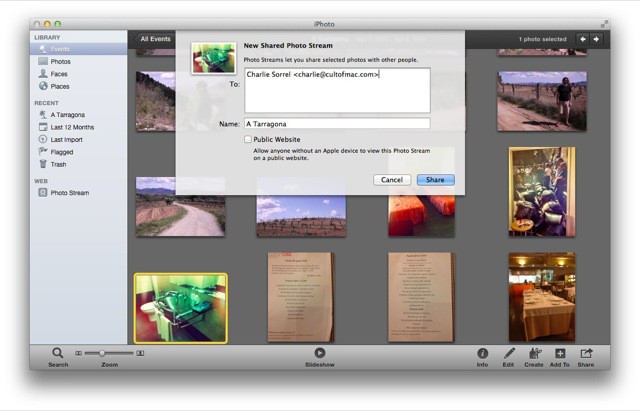
When you want to add new pictures to the album using your Mac, just drag them from the main iPhoto window and drop them on the “Photo Stream” entry in the left sidebar. The same Photo Stream sharing popover will, uh, pop over and you can pic where you want them to go.
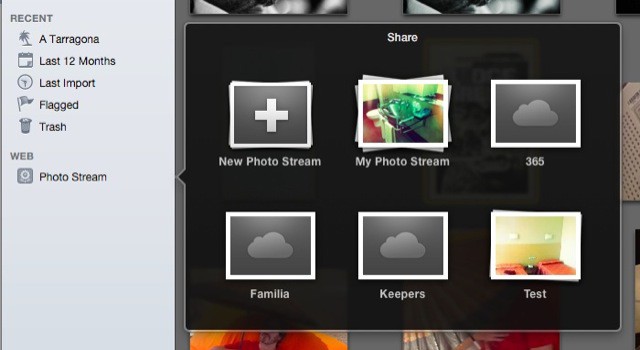
Neat, huh? In fact, this method is so easy that you might consider using it even if you never use Lightroom or another photo app: It’s a lot easier than using iTunes syncing anyway.
Conclusion
Using this method, you get the best of both worlds. You can use Lightroom to edit and organize photos from your “proper” camera, and have them sent right to your iPad. And at the same time you can easily keep and share albums in iPhoto on the Mac, which is the perfect place to wrangle all the photos taken with your various iDevices.
Yes, you still have to put things into albums, but c’mon — what do you want here?
![Sync Lightroom And iPhoto Pictures To Your iPad Simultaneously [How-To] cult_logo_featured_image_missing_default1920x1080](https://www.cultofmac.com/wp-content/uploads/2022/04/cult_logo_featured_image_missing_default1920x1080-1536x864.png)

