Convergence. It’s all the rage, lately, and what better two items to converge than your Mac, running OS X, and your iPad (or iPhone, or iPod touch), running iOS? IT’s two great tastes that taste great together, to quote an old commercial that mostly no one has heard of any more.
With these five tips, you’ll amaze your friends with a Mac that looks more like your iPad than it does your Mac. So, read on, intrepid souls, and follow our steps to make that sweet Apple computer into something resembling the post-PC magical device we all love.
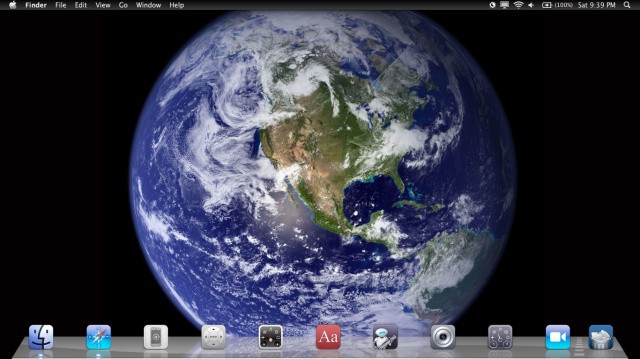
Make Your Dock And Wallpaper More iOS-Like
Ever wished your Mac could look more like your iPhone? Well, you can.
If you watched the almost two-year-old video, you’ll have noticed that the icon set mentioned was hosted on defunct file sharing site MegaUpload. We did a bit of searching around and updated the process so you could do the same thing, today. Aren’t we nice?
First up, let’s make our desktop background look like the default iPhone one, with a nice high resolution image of earth as seen from space. We did a search on Google for “earth mac wallpaper” and found the image we ultimately used in our screenshot above. Once downloaded, right click on your current desktop background and choose Change Desktop Background from the resulting contextual menu. The Desktop & Screensaver preference pane will show up. Simply drag the image you downloaded to the image well there.
Once your background uses the pretty earth from space picture, head over to the Panic website and grab a copy of CandyBar, a Mac app that lets you customize the icons on your Mac. Download the 14 day trial (the non-trial version is $29), and drag the CandyBar application from the resulting disk image to your Applications folder. Double click to launch it.
Then, go to the iconfacory site to grab the freeware icon set, Flurry. Click on the CandyBar iContainer icon to download another .dmg file, which will be called icontainer.dmg. Once downloaded, double click on it and then double click the Flurry System icon, which will cause it to open in CandyBar.
he next bit is kind of tricky, but we believe in you. Click on the little button in the upper left of the CandyBar window that says Change Application Icons in a tooltip when you hover the mouse over it. In addition, click on the Flurry System icons in the left hand pane. Then you’ll see two panes to the right, one with the current applications on your Mac and the other on the bottom with the new icons from the Flurry set. Click and drag the icons from the bottom pane to the icons you’d like to replace in the upper pane. When you’re done, hit the Apply Icons button, and type in your administrative password and allow CandyBar to restart your dock. The new icons will appear there. Hide or quit everything running and you should have something close to our screenshot above.
Make Your Menubar and Dock Look More Like iOS
We found that we can make our Mac look a lot like our iPad screen with a little bit of Terminal command magic, a third party app, and some Finder tweaks. Here’s how to do just that.
First up, if you followed along with yesterday’s tip, this will look even cooler. But, even if you didn’t, you can make your dock look like the iPad dock with some spaces in between the app icons. You’ll need to launch Terminal, found in the Utilities folder, which is itself in the Applications folder. Once Terminal shows up, type or paste the following command into it:
defaults write com.apple.dock persistent-apps -array-add '{"tile-type"="spacer-tile";}'
You’ll need to do this as many times as you want spaces. For example, to create 4 spaces, hit the Up arrow on your keyboard (which recalls the last command so you don’t have to) 4 times and hit Enter 4 times.
Don’t forget to issue the killall Dock command after you’ve created as many spacers as you want, though (thanks, SamDS!).
Move the spacers around, or your app icons around, to recreate that iPad look and feel.
Next up, it’s time to change the menubar. Download a little program called Nocturne from the Google Code page to do so. Once downloaded, launch Nocturne and turn off all the checkboxes except Invert menu bar. Then click on the Switch to Day button at the top of the preference screen. Boom! You’ve got a black menu bar, just like you do on your iPad.
Make The Finder Look More Like Your iOS Homescreen
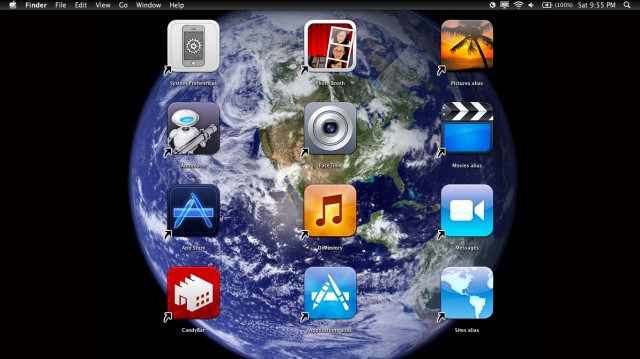
I don’t know about you, but I’m constantly reaching up to swipe or tap on my Macbook Air display, unconsciously attempting to use it like an iPad. While it may make things even worse by turning the Finder into an iPad-like grid of iOS-style icons, I’m willing to take the risk to make my Mac look that much cooler.
So, the first thing we want to do is up the size of the icons on the desktop. Click on the smiley face in the dock to go to the Finder, and then click on the View menu to select the View Options. Or you can just hit Command-J on your keyboard when in the Finder to do the same thing. Make sure you’ve clicked right on the Desktop itself to get the right View Options window, though.
Crank up the icon size to 128 X 128, and then drag the Grid Spacing slider all the way to the right as well. This will make sense as soon as you place your application and folder icons out onto the desktop. Also, choose Sort by Snap to Grid to make sure you can place your icons in alignment with each other.
Next, open the Finder and choose Preferences.. from the Finder menu. In the General tab, uncheck Hard Drives and other volumes you may have on your Mac to hide them from view. Similarly, hit Option-Command-D to hide the Dock from view if you want to have your Mac look like the screenshot above. If not, you may want to revisit yesterday’s tip on making your dock look more iOS-like.
Now, head into your Applications and Home folder and make aliases of the things you’d like on the Desktop. From the Applications Folder in Lion, at least, just drag the icon out to the Desktop and wait a second. The icon will enlarge and grow a little alias arrow in the lower left. You can also just hit the Command-L on your keyboard with an icon selected for non-Application folders, like Movies and Pictures and such.
Once you’ve gotten them on the Desktop, drag them around in to an appropriately iOS-like order and style. The Sort by Grid will keep them looking good in relation to each other, and you’ll be able to make a fairly solid faux-iPad screen out of your Mac Finder.
Optimize Launchpad So It Works More Like Your iPhone
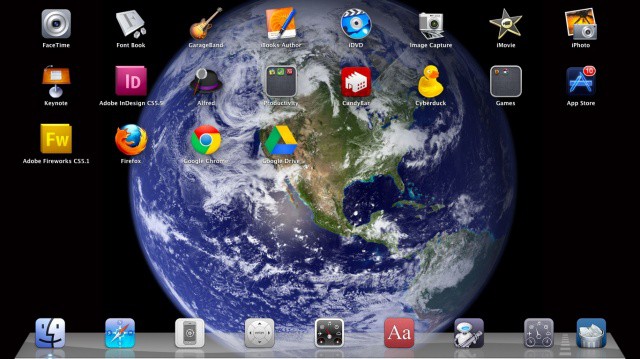
Launchpad automagically places every new app downloaded from the Mac App Store into it’s iOS-style grid structure. It also seems, on my system at least, to have every app I’ve ever had, stuffed into several “pages” of app icons. It’s all a bit much. If I’m wanting to make this thing useful, I’m gonna have to start from scratch.
First, open up Terminal, which is in the Utilities folder, itself found in the Applications folder. Once in Terminal, type or paste the following code:
sqlite3 ~/Library/Application\ Support/Dock/*.db "DELETE from apps; \

DELETE from groups WHERE title<>''; DELETE from items WHERE rowid>2;" \

&& killall Dock
Bam. Launchpad will be empty of all the cruft that’s built up in your Applications folder and such over the years. If you want to put it back to the default, paste the following command into Terminal:
rm ~/Library/Application\ Support/Dock/*.db \

&& killall Dock
Assuming you didn’t quickly put it all back to default settings, it’s time to make things look even more iOS like. First up, let’s clear up the background. If you followed the tips over the past few days, you’ll have a nice picture of Earth from space, which looks a lot like the default iOS wallpaper. When you launch Launchpad, the screen background is all blurry. Let’s clear it up.
Bring up Launchpad and then hit Control+Option+Command+B on your keyboard. This will switch it to a black and white photo. Hit that combo again and you’ll switch to a black and white blurry photo; hit it once more and you’ll have a clear color photo of the earth (or whatever background photo you’ve chosen.
Finally, start putting apps back into Launchpad. Go to the Finder and open the Applications folder. Drag the apps you want in your Launchpad to the icon of the Launchpad in your dock. Once you have all the apps you want, experiment with folders, iOS-style, by dragging one app on top of another app. You’ll have the opportunity to rename the folder, just like on the iPhone, iPad and iPod touch.
Pull Down To Refresh On Your Mac
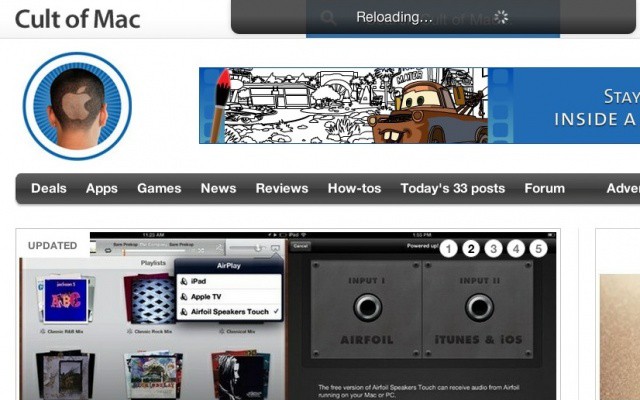
On the iPhone, it’s become de rigueur to use a tap and pull to refresh motion. I first noticed it with the Twitter apps, and now more and more apps are using this style of refresh. I wish I was able to do it on my Mac. Oh, wait, I can – at least in my browser. Here’s how.
This requires a browser extension, and there is one for both Safari and Chrome. The Safari extension, however, requires you be an Apple Safari Dev, with a valid certificate saying so, so I’m gonna skip making it work for Safari. That leaves us with Chrome.
First up, head over to github, a site that many devs and such use for code file management, storage and sharing. Download the Pull-to-refresh-for-Chrome-and-Safari .zip file (for simplicity – the .tar.gz will work as well) and unzip on your Desktop.
Next, go into the just-unzipped folder and open the folder named ‘chrome.’ Double click on the pull_to_refresh.crx file, which should bring up your Chrome browser, and give you a little warning at the bottom.
Click on Continue, and it will install in Chrome. Then, using your trackpad, or (I’m assuming – someone check) Apple mouse, you will be able to scroll up past the top of a page, and the browser window will refresh. Limited, but kind of cool, right?
Some reports say this only works in Lion. If anyone tries it in Snow Leopard, or, heck, even Leopard, let us know if it works in the comments below.
Got any good tips on how to make your Mac more iOS-like? Let us know in the comments.</em?
![Make Your Mac Look And Act More Like An iOS Device [Feature] Dock Wallpaper iPhone](https://www.cultofmac.com/wp-content/uploads/2012/05/Dock-Wallpaper-iPhone.jpg)


