Tweetbot is undoubtedly the hottest Twitter client available for iOS right now, and thanks to its arrival on the iPad last week, there are thousands of new users discovering the app for the first time. If you’re one of them, the first thing you’ll want to know is how to enable push notifications.
Push notifications aren’t setup when you first install the app, so you’ll need to do it manually. Here’s how!
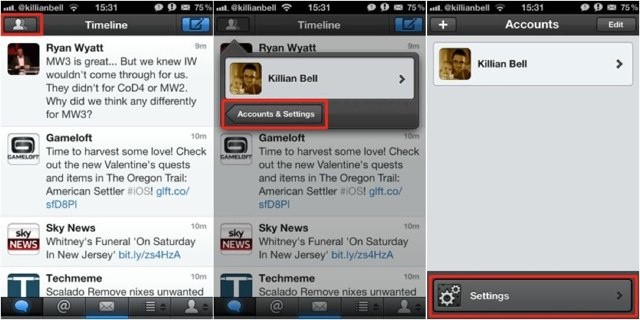
Open up Tweetbot and tap on the users icon in the top left corner, then tap ‘Accounts & Settings’. Now tap the ‘Settings’ button at the bottom of the page.
Under the ‘Account Settings’ header, tap your Twitter username, then choose the ‘Notifications’ option.
Here is where you can specify which notifications you’d like to receive. Turn on all of the alerts you’d like to see and leave the ones you want to ignore turned off.
Once you’ve done this, you can go back to your timeline.
To ensure iOS doesn’t block your notifications, open up the Settings app and tap the ‘Notifications’ tab, then find Tweetbot in your list of apps. Turn on the Notification Center option if you’d like to see your alerts there, and be sure to choose what kind of alert you’d like to see. If you leave this on ‘None’, you won’t see any popups at all.
You should now begin receiving notifications for Tweetbot. Enjoy!
![How To Enable Push Notifications For Tweetbot [iOS Tip] tweetbot-icon-logo](https://www.cultofmac.com/wp-content/uploads/2012/02/tweetbot-icon-logo.jpg)


